Money-saving Tips

I am always on the lookout for deals. This post describes how I save money on flights, luggage, rental cars, parking, and food while traveling. What do you do to save money while traveling? Let me know!

FLIGHTS

Get familiar with the routes you are likely to fly and monitor them so you know when a price is a good one. Google Flights is the best website I've seen for this purpose. You can use it to search for flights while filtering by airline, number of stops, price, departure or arrival time, or connecting airport. You can track routes and be notified when a tracked price changes. If you're not sure when you want to travel, you can get a calendar with prices. If you're not sure where you want to travel, you can get a map of destinations with prices:

Google Flights - Flights from Toronto

Exploring flights from Toronto using Google flights

Sign up to airline newsletters so you know when they add or modify routes. For example, this is how I found out that Air North added routes from Ottawa and Toronto to Yellowknife and Whitehorse.

Be aware of new airlines and the routes they fly. For example, the ultra low-cost carrier market is heating up in Canada; new airlines such as Lynx Air and Canada Jetlines have joined Flair and Swoop. Their low airfares pressure Air Canada and WestJet to lower prices on the same routes. Be aware that low-cost carriers make you pay extra for everything - from a carry-on bag to seat selection.

LUGGAGE

I have a credit card that includes one free checked bag on all West Jet flights. You can use ratehub.ca to search for the best credit card for your needs.

I love flying Air North for numerous reasons (most importantly, it takes you north!), but they also include two checked bags in their ticket prices. They also serve warm and yummy cookies.

RENTAL CARS

I constantly check rental car prices on Expedia because rates can vary greatly from week to week. When I find a good price that includes free cancellation, I book it but I keep checking the price. When I find a better price, I rebook and cancel my first reservation. This can save hundreds of dollars.

I book rental cars many months (sometimes over a year) in advance, often before I book flights. As long as you remember to cancel, it costs nothing to lock in at a low rate.

I rent small cars to save money on gas. I own a larger car because I like the space, but I can temporarily make do with a smaller one while traveling.

PARKING

When I fly out of Toronto, I get a coupon for Park 'N Fly.

FOOD

Bringing your own food saves tons of money. For example, when flying Air North (which includes two free checked bags), I include lots of Clif Bars in my checked luggage, which I buy cheaply when I'm at home.

Yukon During a Pandemic

I finally did it. I got on an airplane during a pandemic. In fact, I got on four! Let me start by acknowledging how privileged I am to have been able to do that.

I decided that my first trip in the COVID era would be to my favourite part of Canada - Yukon. It was the perfect destination - it's wild, sparsely populated with a high vaccination rate, and reachable with a non-stop flight from Vancouver, where I could visit wonderful friends I hadn't seen in years.

My trip started from my home in Belleville, Ontario. The first phase was getting to Toronto's Pearson International Airport, about two hours west of Belleville. My flight departed at 10am, so I left home around 5:15am to give myself lots of time. Traffic wasn't an issue on Highway 401 and parking at the Park 'N Fly self-park lot was seamless. The shuttle bus waited near my car and took me straight to Pearson's Terminal 3.

I had one large duffle bag to check, a heavy carry-on bag with camera gear, and a laptop bag (see my luggage tips), so I picked up a free luggage cart and dropped off my checked bag. I had read horror stories of people waiting hours to drop off their luggage, but I had no issues. There was an open machine to print my luggage tag and no line-up to drop it off.

My flight to Vancouver was uneventful. My flight from Vancouver to Whitehorse was with Air North and I had forgotten how great they are. Their prices were low but they still included two checked bags (I only needed one) and good food. On my flight, we got a ham sandwich (made with actual ham!) and a warmed chocolate chip cookie. Cookies are always a great way to start any trip.

Speaking of food, I was able to bring lots in my checked bag because I didn't need to leave space for camping gear. I brought Clif Bars, trail mix, dried apricots, and almonds. Rather than camping, I stayed at AirBnb locations in Whitehorse and Vancouver. It was a new experience but I liked it. There was never any worry about where to get potable water, how to charge camera batteries, or what to do when it was raining. That being said, I can't wait to go camping on my next road trip.

Birding was the main purpose of my trip. I worked toward my goal of observing 100 bird species in every Canadian province and territory (see how I did with my birding goals in 2019). Before the trip, I had 79 species in Yukon. I hoped to reach 100, but it was not to be. I saw zero gulls and zero shorebirds during the whole week! Oh well. I got my Yukon list to 90 and my next trip (en route to Inuvik!) is already booked. It will be earlier in the fall and shorebirds will hopefully be easier to find.

I knew it would be difficult to find birds on day one. I picked up my rental car and checked in to my AirBnb. The check-in process was significantly quicker and easier than a hotel - an open door with the key on the table! I arrived late in the afternoon without much daylight left so I headed northwest on the Alaska Highway. It was a beautiful drive. There was so much bright yellow foliage!

Drury’s Farm Pond, about 37 km northwest of Whitehorse on the Alaska Highway

However, when I arrived at Drury's Farm Pond, there were very few birds. The spot had potential, but late September was just a tad too late for it to be packed with ducks and shorebirds.

I had only four days in Yukon, so I really filled them with birding. I got up before sunrise and birded each day until sunset. I covered as much ground as I could with a rental car that only included 1400 free kilometres. (I’m frugal!)

DAY 1 - SOUTHEAST TO TESLIN

Deadman Creek, about 28 km north of Teslin, Yukon

On my way back to Whitehorse from Teslin, I stopped at Judas Creek Marina on Marsh Lake. There were a few birds such as my first American Tree Sparrows in the Yukon, but I had no idea this bird was right above me on a pole:

Bald Eagle at Judas Creek Marina - Marsh Lake, Yukon

I only saw it because a man in a work truck stopped to ask me what I was taking pictures of. I told him about the tree sparrows and he asked if I was interested in what was directly above my head. I hadn’t even noticed it!

DAY 2 - NORTHWEST TO HAINES JUNCTION AND KLUANE NATIONAL PARK

My trip was in September, so I wasn’t expecting snow. However, that’s what I got and I was glad it was there during my drive to Kluane National Park. There was a light dusting of white on everything, and it made the already beautiful scenery even more incredible.

I found my first American Pipits on the shore of Kathleen Lake and spent some time just taking in the view.

American Pipit on the shore of Kathleen Lake in Kluane National Park, Yukon

Kathleen Lake, Kluane National Park, Yukon

DAY 3 - SOUTH TO CARCROSS

It was particularly dreary on day three, with rain all day alternating between a light drizzle and a heavy downpour. I went south of Carcross toward the British Columbia border and enjoyed the extremely low traffic volume.

Bove Island Lookout, about 11 km south of Carcross, Yukon

DAY 4 - NEAR WHITEHORSE

On day four, my flight left in the afternoon so I stayed close to the city. I went back to the Whitehorse sewage lagoons, where I could only see birds without trespassing by using my telescope through a small gap in the fence. I stumbled upon two mule deer on my way back to town.

Mule Deer near Whitehorse, Yukon

SUMMARY

All in all, it was a great trip. I got on an airplane for the first time in 20 months, got to spend time with awesome people, and added eleven bird species to my Yukon list (see below). Up next, I’ll talk about how I saved money on this trip.

Bird species added to Yukon list

  • Snow Goose

  • Canvasback

  • Surf Scoter

  • Ruddy Duck

  • Ruffed Grouse

  • Northern Harrier

  • Sharp-shinned Hawk

  • Red-tailed Hawk

  • Peregrine Falcon

  • American Pipit

  • American Tree Sparrow

2019 by the Numbers

What are your goals and how do you measure your progress toward them?

My goals are to continuously learn, spend lots of time with friends and family, have fun experiences in nature, visit many parts of Canada and see lots of wildlife. This article embraces my numerical geekiness and summarizes my 2019 results on the latter two - visiting Canada and seeing wildlife. I am incredibly grateful that I can work on those goals while also having a fulfilling job for an organization that means a lot to me.

Canadian Travel

In 2019, I didn't leave Canada. I spent 148 nights away from home in 90 locations – 79 nights in 50 hotels in 45 cities, 35 nights in 30 campsites, 20 nights in two university dorm rooms, six nights in four bed & breakfasts and eight nights in four houses. I stayed overnight in all ten provinces and two territories (sorry Northwest Territories... I'll get to you this year!). I camped in six provinces and one territory. I visited Labrador for the first time. All in all, my goal to travel Canada was met!

Waiting to board the Qajaq Q Ferry in St. Barbe, Newfoundland. The ferry takes one hour 45 minutes to reach blanc Sablon, Quebec near the Labrador border. It’s the cheapest way to visit labrador with an added bonus of thousands of gannets on the cro…

Waiting to board the Qajaq Q Ferry in St. Barbe, Newfoundland. The ferry takes one hour 45 minutes to reach blanc Sablon, Quebec near the Labrador border. It’s the cheapest way to visit labrador with an added bonus of thousands of gannets on the crossing!

Seeing Wildlife

I contribute many photos to iNaturalist and eBird, citizen science projects that automatically calculate statistics. I've posted over 5000 images of living things to iNaturalist (lately I've gone back to post all my plant photos from the last decade) and 4400 bird photos to eBird.

Both sites help me learn so much. I posted a photo of a slug in my campground on Haida Gwaii and learned that it's not just any slug, it's a Pacific Banana Slug (Ariolimax columbianus). That trillium from the Smoky Mountains isn't just any trillium, it's Painted Trillium (Trillium undulatum), in the same genus as the Great White Trilliums (Trillium grandiflorum) that blanket the forest floor in Sandbanks Provincial Park each May.

Painted Trillium, Smoky Mountains, Tennessee

Painted Trillium, Smoky Mountains, Tennessee

Pacific Banana Slug, Haida Gwaii, British Columbia

Pacific Banana Slug, Haida Gwaii, British Columbia

Birding Goals

eBird is a spectacular tool. I use its smartphone app to record my bird sightings and it automatically keeps track of how many different species I have identified in each region. (Note that I use "identify" rather than "see" because some birds are more easily identified using sound).

Canada Map on My eBird Profile. Redness indicates the number of species identified in each province & territory. I can’t wait to make nunavut redder!

Canada Map on My eBird Profile. Redness indicates the number of species identified in each province & territory. I can’t wait to make nunavut redder!

British Columbia Map on my eBird profile. I must get my Sunshine Coast, Powell River and Port Alberni lists over 50!

British Columbia Map on my eBird profile. I must get my Sunshine Coast, Powell River and Port Alberni lists over 50!

My birding goals will take years (decades?) to accomplish:

  • 200 species in each Canadian province & territory
  • 50 species in each eBird region of Canada
  • 10000 Canadian "region ticks"
  • Canada life list exceeds USA life list

The first goal is easy to understand - 200 species identified in each province and territory. Nunavut will be hard - I've been there twice and my life list is only nine - but I can't wait to try!

Canadian "region ticks" are the sum of my life list in every Canadian region (BC Sunshine Coast list plus BC Northern Rocky Mountains list plus Newfoundland Avalon Peninsula list, etc.). My current number is 8818 and it's possible I'll get over 10000 in 2020.

I added 10 species to my Canada life list in 2019 (see below) bringing my total to 377. My USA life list is 430 so at that rate, it will take another six years for my Canada list to surpass USA. I could shorten that time by going on pelagic birdwatching trips to see shearwaters and petrels but I haven't felt compelled to do that yet.

Birding - 2019 Highlights

2019 was a great year for birds! My highlights were:

  • I identified at least 100 species in five provinces (ON - 204; BC - 153; QC - 122; AB - 111; NL - 104).
  • I had 1070 "province/territory year ticks" (the sum of my BC year list plus my AB year list, etc.). 2019 was my first year over 1000.
  • My life list in nine provinces is now at least 110. The only province under 100 is PEI at 76. I'm travelling there for work in the spring and in July so I should get all provinces over 100 in 2020. I will also make progress on the territories - I am vacationing in Inuvik, Northwest Territories (life list 65) and Whitehorse, Yukon Territory (life list 79) in the spring. I am also visiting Nunavut but that's in March for work so I don't expect to see any birds other than ravens. Maybe I'll luck into a Snow Bunting or two!
  • I added four species to my world life list (Curlew Sandpiper, Pomarine Jaeger, Sooty Shearwater and Sooty Grouse) while in Canada, bringing my North American total to 539. It must have been a sooty year!
  • I added six other species to my Canada life list (Western Sandpiper, Piping Plover, Eurasian Skylark, Hutton's Vireo, Rhinoceros Auklet and Black-throated Gray Warbler), bringing my total to 377.
Pomarine Jaeger, Forteau, Labrador

Pomarine Jaeger, Forteau, Labrador

Piping Plover, Codroy Valley Provincial Park, Newfoundland. I love the sidney crosby leg band! It indicates that this individual is a female banded as a chick in July 2018 at J. T. Cheeseman Provincial Park in Newfoundland. She was also spotted in s…

Piping Plover, Codroy Valley Provincial Park, Newfoundland. I love the sidney crosby leg band! It indicates that this individual is a female banded as a chick in July 2018 at J. T. Cheeseman Provincial Park in Newfoundland. She was also spotted in spring 2019 in Georgia on her way north!

Summary

Withdrawing from the rat race of 9-5 desk jobs and foregoing the pursuit of titles and money was the best decision I ever made. Doing so allowed me to stumble upon a lifestyle filled with travel, nature and meaningful work. I know it's not for everyone and I'm fine with that. I'm extremely grateful that it works for me!

Why Birds?

I am obsessed with birds. I like learning about them, searching for them, listening to them, watching them and photographing them. My vacations are based on where I've never looked for them. Why? Why do I like birds so much? That's easy! They're ubiquitous, beautiful, identifiable to species and do cool things.

Ubiquity

I consider myself a mammal watcher just as much as a bird watcher but mammals can be scarce. You can't see many species of wild mammals on a walk through downtown Toronto. On the other hand, birds live in almost every habitat on earth, from the centre of the largest city to the driest prairie. Unless you're an astronaut in deep space or a diver in the deep ocean, birds are nearby.

Birds can show up anywhere! This dunlin is one of many species I’ve found on the breakwater at Waupoos in Prince Edward County, Ontario

Birds can show up anywhere! This dunlin is one of many species I’ve found on the breakwater at Waupoos in Prince Edward County, Ontario

This Cape May Warbler oddly showed up at a feeder over Christmas in Belleville, Ontario

This Cape May Warbler oddly showed up at a feeder over Christmas in Belleville, Ontario

One of my birding goals is to identify (either by sight or sound) at least 50 bird species in every eBird region of Canada. That's an ambitious goal but I'm well on my way. By the end of 2020, I expect to have reached that goal in British Columbia and intend to gradually work my way east in the years to come. No matter where I go, I use eBird and Birdseye apps on my smartphone to help me find birds I have never seen in that region. Business trip to Waterloo? Stop at the Grand River on the way home for that rare Curlew Sandpiper! Family event in Gatineau? Drive around looking for birds I've never seen in Quebec!

Beauty

Birds are downright beautiful. Even common species like American Robin and Ring-billed Gull are very pretty if you really stop and take a look. Therein lies another reason I like birds – they make me stop and appreciate the immense beauty I am lucky to be surrounded by.

American Robin - Watson Lake, Yukon

American Robin - Watson Lake, Yukon

Ring-billed Gull - Belleville, Ontario

Ring-billed Gull - Belleville, Ontario

Beyond the common, other species are beautiful almost beyond description, like the Great Egret and its wispy plumes or the Blackburnian Warbler and its blazing orange throat.

Great Egret - High Island, Texas

Great Egret - High Island, Texas

Blackburnian Warbler - Prince Edward Point National Wildlife Area, Ontario

Blackburnian Warbler - Prince Edward Point National Wildlife Area, Ontario

Identifiability

Birds fall in the Goldilocks zone of identifiability - just enough species but not too many. Damselflies and beetles are cool but you may not be able to identify them to species without killing them. There are an overwhelming number of beetle species - over 350,000! Birds are just right, with about 1,000 species ever recorded in Canada and 10,000 in the world.

Behaviour

Birds do so many cool things. For starters, they fly! Owls fly silently and can spin their head like an Exorcist doll. Hummingbirds can hover and flap their wings up to 70 times per second. Birds migrate. Arctic Terns fly from their Arctic breeding grounds to live in Antarctica during its summer, travelling about 25,000 miles per year. Superb Lyrebirds imitate the sounds other birds make and incorporate human sounds like a camera shutter, chainsaw and car alarm in their audio repertoire.

They're Living Dinosaurs!

If you’ve ever seen a great blue heron up close, you’ll appreciate this one.

Great Blue Heron - Prince Edward Point National Wildlife Area, Ontario

Great Blue Heron - Prince Edward Point National Wildlife Area, Ontario

Luggage Tips

Almost ready! my backpack and sleeping bag are in. Trail shoes, tent poles, a tripod and a small toiletry bag get crammed in the remaining space.

Almost ready! my backpack and sleeping bag are in. Trail shoes, tent poles, a tripod and a small toiletry bag get crammed in the remaining space.

Hello and welcome back to my blog! I haven't written here in a while but this article will be the first of many coming soon.

I changed how I vacation in 2019. Previously, I did camping road trips from home in my own vehicle. This year I started three camping road trips with a flight and rented a car at my destination. This article explains what I brought to make these trips successful. In other articles, I will cover many topics on how I improve my travel experience - everything from rental cars and food to navigation and photography tips to smartphone apps.

When I went car camping, I just loaded my SUV with gear. I brought a huge first aid kit, extra tarps, a spare sleeping bag and almost every lens I own. If I might need it, I brought it! It's a mindset change to only bring what you will definitely need but that's what's necessary when you fly. You have two restrictions with luggage - weight and volume. Checked bags can typically weigh up to 50 pounds (23 kilograms) and I don't want more than one. How do I get all my gear for camping, hiking, photography, birding and Shad in one 50-pound bag? Keep reading!

I don't want to waste any weight on the luggage itself so my checked bag is a lightweight and durable MEC duffel bag. It can really take a beating! I’ve dragged it through Toronto's Union Station more times than I can remember. Inside is:

The top four bags fit into my backpack, which in turn fits in my duffel bag. The 7- and 9-liter stuff sacks have clothing. The small Orange dry Bag holds My tent and fly. The black bag is my sleeping pad. The large orange dry bag holds my sleeping b…

The top four bags fit into my backpack, which in turn fits in my duffel bag. The 7- and 9-liter stuff sacks have clothing. The small Orange dry Bag holds My tent and fly. The black bag is my sleeping pad. The large orange dry bag holds my sleeping bag.

  • an Osprey Kestrel 38-litre backpack filled with:
    • two stuff sacks of clothing (9-litre and 7-litre)
    • a Woods Cascade 2-person tent compressed in a 9-litre dry bag
    • a Therm-a-Rest ProLite Plus sleeping pad
    • one pair sweatpants (which can also be used as a pillow)
  • a MEC Centaurus sleeping bag compressed in a 35-litre dry bag
  • a tripod, hiking poles and tent poles all wrapped in a fleece sheet (sheet protects items during travel and can also be used as a pillow or for extra warmth)
  • one pair trail shoes stuffed with socks and foldable water bottles (I bring three one-litre bottles and a 500 mL bottle);
  • lightweight sandals (used when showering; can also be worn around camp)
  • Tent pegs (optional)
  • Tilley hat
  • Jetboil Flash backpacking stove filled with duct tape, one large garbage bag, a tiny flashlight, add-water towels MEC towel
  • a small toiletry bag

CLOTHING

The keys for everything when travelling are versatility and weight, but that's particularly important with clothing. I'm frugal but I'll pay for a lightweight piece that will last years. I can fit ten T-shirts and two pair shorts in a 7-litre stuff sack and rain pants, wind jacket, long-sleeved base layer, sweater and socks in a 9-litre stuff sack.

TIPS

  • Wear your heaviest footwear on the plane. This lowers the weight of your checked bag. For example, wear hiking boots in summer and winter boots in winter.
  • Don't bring books. Books are heavy so leave them at home. Much of what I used to bring in printed books is now on my phone (such as field guides for birding, audio books on Audible and offline maps on Google Maps).
  • Don't bring large bottles of toiletries. Toiletries can be surprisingly heavy. Bring hotel sizes to lessen the weight of your checked bag.
  • Don't bring laundry detergent or food. Buy them at your destination.
  • Put smaller delicate items in a laptop bag. For example, I put binoculars, spare camera batteries, camera flash, tablet, headphones, iPhone cables and extra eyeglasses.
  • Don't be afraid to fly with overweight carry-on bags. Flight attendants are much more likely to notice an oversize bag than an overweight one. I carry on two bags - a laptop bag and a GuraGear backpack filled with my camera gear and telescope. I have flown dozens of times when the latter is overweight and it has never been a problem.
  • Put a coat with many large pockets on top of a carry-on bag. I use a heavy-duty GoreTex rain jacket. If someone forces me to lower the weight of my carry-on bag, I'm ready! I will take the coat out, fill its pockets with gear, and wear it on the plane. The weight of items on your person doesn't count. I'll wear an eight-pound camera necklace if I have to!

What is one item you absolutely have to bring when you travel? Let me know!

Ptarmigans and Musk Oxen

I was in Teller, Alaska on the rainy windswept shore of the Bering Sea, 95 km by gravel road from the nearest gas station in Nome. I was doubtful I had enough fuel to get there. The only person braving the elements was a fisherman cutting gear with a knife like a machete that was longer than his forearm. The whole place looked deserted. Rusted cars with flat tires or smashed windshields or both sat idle in front of almost every building, exposed to the relentless north. What was I to do?

First, let me explain how I got into this predicament. I do lots of research on the places I visit but no amount is ever enough. I had no idea that Teller was basically a ghost town! There were no signs about the lack of gas stations when I left Nome. Perhaps I had become complacent after visiting Whittier, a tiny coastal town reachable only by taking a shared railway/car tunnel. They had a restaurant with wifi that was open at 10 PM so surely Teller would have a gas station, right?

I left Nome at 5:30 AM and planned to stop in Teller for lunch, fill up, and head back. I took my time. I stopped at every eBird hotspot to look for rarities. It was 11:30 AM before I got close to Teller. The closer I got, the more concerned I became. There was an airport but there was not a restaurant or gas station; there weren't even other people save for the fisherman. I hadn't seen another car for over an hour. The drive didn't yield any rarities except for a possible Northern Wheater near a gravel pile at milepost 41 where Bluethroats had also been reported. However, I was delighted with the number of ptarmigan - four Rock Ptarmigan and eight Willow Ptarmigan. They often sat motionless beside, or even on, the road. If only more animals were such dutiful subjects!

Willow Ptarmigan (male), Nome-Teller Highway, Alaska

Willow Ptarmigan (male), Nome-Teller Highway, Alaska

With the meter on my rented red Jeep reading an eighth of a tank, I decided it was best to head for Nome and get as close as I possibly could. I fully expected to run out of gas and rely on the kindness of strangers to help me get back. (There is no cell reception on the roads outside Nome.) I did everything I could to conserve fuel. I didn't stop, even for birds. Nonessential items like rear defrost and headlights were disabled. Front wipers were used as infrequently as possible. I used cruise control initially at a slow speed of 50 km/h to reduce RPM. The mileposts counted down agonizingly slowly... 72... 71... 70. Before milepost 60, I heard a ding. My jeep calmly reminded me that I needed fuel. Thanks for the update!

Dashboard indicator lights and car problems in general are mostly ignored in Nome. My jeep's check engine, check tire pressure, and check gas cap indicators were all constantly on. I was told to simply ignore them. The gravel roads take such a toll that nobody ever gets indicators fixed. Plus, there's nowhere to get them fixed even if you wanted to. My taxi van to get to the airport had one back window missing and a wide crack across the entire front windshield that forked on the passenger side and looked like a giant sideways Y. However, I knew my jeep's fuel indicator was legitimate.

I conserved fuel further by using neutral on hills. At one point I went over two miles without using the accelerator! The mileposts kept counting me down... 60... 50... 40. I saw the first other cars around milepost 35 so I knew at least there would be an opportunity to ask for help when those people returned to Nome. At milepost 23, my jeep's engine stopped and I pulled to the side of the road, disappointed that I hadn't made it further. As a last resort, I tried to restart the car and it worked! I got to milepost 20... 15... 10. The fuel gauge was well past empty when the outskirts of Nome came into view. Pavement started around milepost 7 and I started seeing roadside runners competing in a race. I casually rolled into town desperate for the gas station.

I actually made it! I've never been so happy to pay $95 US dollars for a tank of gas in my life! After the euphoria wore down, I went back to my hotel, ate dinner, and decided that I had to return to the road that had nearly defeated me. Were there really wheatears and bluethroats at milepost 41? After more than an hour of driving and plenty of searching, I found neither. I started the drive back to Nome, this time confident that I had enough gas for such luxuries as headlights and stopping.

I was ecstatic when I needed to stop just before Nome. Musk oxen were on the road! They're such cool and weird beasts, looking like they should be tripping over their own long fur. According to Wikipedia, their Inuktitut name "umingmak" translates to "the bearded one". I like that!

Musk Oxen, Nome-Teller Highway, Alaska

Musk Oxen, Nome-Teller Highway, Alaska

The moral of this story is twofold. First, always leave Nome with a full tank of gas. Second, pay attention when driving the roads there - you never know when you'll see a ptarmigan or musk ox!

It's All Good!

That's my mantra and it's particularly relevant during travel. Like life, travel has its ups and downs but it's best to focus on the positive. I'm in Anchorage contemplating the first 8000 km of my journey from Ontario to Alaska and BC. I'm in a hotel room and it's the first time I haven't stayed in a tent in two weeks. There are the obvious big things that bring me joy like having a roof and knowing that my family and friends are healthy and safe but this post describes smaller things that made me smile.

Stumbling Onto a Perfect Campsite

I knew the Lakeview Campground at Alaska's Tetlin National Wildlife Refuge existed but I didn't know it was going to be perfect! Not only is it free, it has sites right by a small calm lake with lots of wildlife and there's a great place to launch a kayak. Plus, it wasn't even busy!

Lakeview Campground, Tetlin National Wildlife Refuge, Alaska

Lakeview Campground, Tetlin National Wildlife Refuge, Alaska

Powerwashing Manitoba Mud in BC

Heavy rain plus Manitoba backroads equalled one muddy car. I hoped that rains would clean it off before Dawson Creek, BC but that didn't happen. I learned my lesson last year about vehicle height with a kayak on the roof so rather than a car wash, it was the old-fashioned do-it-yourself powerwashing. So clean!

First Warm Shower

I'll spare you the details of exactly how infrequently I shower while camping. Regardless, the first warm one in a while is so refreshing!

Finding Baby Animals

It's a tight battle for the cutest baby animal. I really liked spruce grouse chicks in Alaska's Wrangell Mountains but these adorable baby moose near Anchorage were the best!

Baby Moose, Potter Marsh, Anchorage, Alaska

Baby Moose, Potter Marsh, Anchorage, Alaska

Turning Off the Windshield Wipers

The first week of my trip had lots of rain. It's a great feeling when you can turn off the wipers after they've been on continuously for hours (or days!).

Alaska Highway Mentioned on a Sign

I got a big smile west of Edmonton when I saw it mentioned for the first time: "For Alaska Highway, follow Highway 43 North". Yes!

Long Distances

I like it when the GPS has no instructions for more than 400 km as it does west of Edmonton. It's also cool when four digits are required on a distance sign as in Fort St. John when drivers are told that Whitehorse is in a mere 1342 km.

Identifying New Birds by Their Song

Identifying birds by their song is hard. I've been learning to do so for a few years and it's a good feeling when that work pays off. I had two examples on a mountain road near Anchorage. Is that high-pitched trill an orange-crowned warbler? Affirmitive! Is that plaintive call a golden-crowned sparrow? Confirmed!

Orange-crowned Warbler, Anchorage, Alaska

Orange-crowned Warbler, Anchorage, Alaska

Golden-crowned Sparrow, Anchorage, Alaska

Golden-crowned Sparrow, Anchorage, Alaska

Not Getting Gas

After filling up at least once every day for two weeks, what a great feeling today not visiting a gas station!

Time Zone Changes

I always seem to forget that you gain an hour as you travel west. Nice!

Sound Ice Makes On a Frozen Lake

Last week I paddled the edges of Summit Lake at Stone Mountain Provincial Park in northern BC. It's the highest point on the Alaska Highway and the lake was still mostly ice-covered. The ice chunks made such an appealing tinkling sound when they moved!

What makes you happy when you travel?

Worth the Wait!

It finally happened! The dark sky danced as I sat awestruck in my lakeside campsite at Quetico Provincial Park in northern Ontario. The Northern Lights were on full display and I was mesmerized. Undulating green waves pulsed overhead. Subtler, but equally beautiful, movement occurred all across the sky at eye level.

Northern Lights, Quetico Provincial Park, Ontario (8s exposure; f/2.8; ISO 1600)

Northern Lights, Quetico Provincial Park, Ontario (8s exposure; f/2.8; ISO 1600)

It's hard to believe given my recent proclivity for the north that I haven't seen the Northern Lights this well since childhood. Believe me... it was worth the wait!

I already had the proper lens on my camera for night images - the Samyang 24mm f/1.4. It's manual focus and manual aperture. So old school... I love it! The irony was not lost on me as I googled "how to photograph the Northern Lights" while I was far removed from any city. (There was strangely good cell coverage in the campground.) The tips were simple - use f/2.8 and experiment with exposures between 5 and 25 seconds. So experiment I did! I moved my tripod around and used my headlamp to illuminate nearby trees and help position them in the image. I used live view on the camera to focus and construct a composition that might work. Which one is your favourite?

Northern Lights, Quetico Provincial Park, Ontario (25s exposure; f/2.8; ISO 1600)

Northern Lights, Quetico Provincial Park, Ontario (25s exposure; f/2.8; ISO 1600)

Northern Lights, Quetico Provincial Park, Ontario (10s exposure; f/2.8; ISO 1600)

Northern Lights, Quetico Provincial Park, Ontario (10s exposure; f/2.8; ISO 1600)

Northern Lights, Quetico Provincial Park, Ontario (10s exposure; f/2.8; ISO 1600)

Northern Lights, Quetico Provincial Park, Ontario (10s exposure; f/2.8; ISO 1600)

It was hard to go to sleep and potentially miss more of nature's greatest show but clouds eventually rolled in and cut the lights. It was after midnight but that didn't stop me from getting up at 6:15 the next morning for a quiet paddle on pristine Pickerel Creek. In only one night, Quetico quickly rose to one of my favourite places!

Let a Whim Blaze Your Trail!

I've been bitten by the travel bug. Hard. I'm lucky to have three adventures to look forward to this year. In June, I'm camping from Ontario to BC & Alaska and exploring the Bering Sea coast in Nome (you know what they say... there's no place like Nome!). In July, I'm returning for a fifth year as a faculy member at SHAD UBC. In August, I'm a staff member on Students on Ice's Arctic Expedition. I can't wait to explore North America's vast and magnificent wilderness and meet the talented students and inspiring colleagues at SHAD and Students on Ice.

Travel is an intensely personal experience. Some like an all-expenses paid trip to a Caribbean getaway or a luxury vacation with a detailed itinerary. Those aren't my style. My favourite type of travel is a camping trip backed up with a lot of research but no reservations. If a place is so busy that it requires reservations, I opt for an alternative. For example, I know that I'll drive entirely through Canada to get to Alaska, but I have no idea exactly where I'll stay. In Ontario, I'm interested in camping and kayaking in Lake Superior & Quetico Provincial Parks and looking for birds near Rainy River (gotta see those Ontario pelicans!). However, weather and other considerations may put me elsewhere. It's great to know that when I see an inviting calm lake to paddle on, I can just pull over and do it! Research ensures that I know my options but it's often a whim that blazes my trail.

Algonquin Provincial Park, Ontario, Canada. Where will I kayak this year?

Algonquin Provincial Park, Ontario, Canada. Where will I kayak this year?

One of my goals is to write more so I will update this blog at least once a week during my adventures. See you soon!

Just about ready to load the car!

Just about ready to load the car!

Review: Sleeklens Lightroom Workflows

DISCLAIMER: I was provided the products under review for free. This did not impact the review.

This is a review of two Lightroom Presets packages from Sleeklens:

Sleeklens also has Lightroom tutorials on their website.

What You Get

Each package comes with presets and brushes that integrate directly into Lightroom. The Through the Woods Workflow package has 50 presets and 30 brushes; the Aura Laborar Night Workflow package has 122 presets and 10 brushes.

Presets and brushes differ in how much of the photo they impact. Presets apply changes to an entire photo; brushes apply changes only to specified areas of a photo.

Installation

Installation was a breeze. Each package comes as a compressed ZIP file with two folders - one for presets and one for brushes. You extract each folder to a special place (clearly explained in Sleeklens's instructions) so that Lightroom knows where to find them.

You can copy the presets and brushes into Lightroom's installation hierarchy so that they are available in every catalog or into a specific catalog. I have all my photos in a single catalog so I chose the latter so that the presets and brushes are automatically available when I edit photos in the catalog on another computer.

Pros & Cons

The presets provide a very fast way to see what different effects would look like on a photo. As you move the cursor over each of the presets, you see in the navigator what the photo would look like with that preset applied.

The brushes allow you to apply edits only to specific areas of a photo. For example, if you have a photo of a woman in a red dress and a red building, you may want to brighten the dress while not impacting the building of the same colour.

One complaint I have is about the names of the presets and brushes. For example, it's hard to know what a brush named "Top Secret" will do to a photo and it's hard to distinguish the difference between brushes named "Punchy" and "Punch It Up" (which both exist in the Through The Woods package).

Summary

These are good tools for any Lightroom photo editor. I will use Sleeklens presets as a starting point in my photo editing. Once applied, I will fine tune the develop settings and use Sleeklens brushes to achieve the final result.

Image-taking Workflow

The most important part of any photography workflow is the actual act of taking an image. When doing so, why should you turn your camera off automatic mode? Because it's not as creative as you are. Even the best camera in the world can't possibly know the type of image you desire. You wouldn't let your camera decide what lens to use, how much to zoom, or which direction to shoot, so don't let your camera decide aperture and shutter speed. Take control and move away from automatic mode!

The best modes to start with when moving away from automatic are aperture priority (Av on Canon cameras; A on other cameras) and shutter priority (Tv on Canon cameras; S on other cameras). As their names suggest, the modes differ in what the photographer deems a priority. In aperture priority mode, the photographer has decided that aperture (which impacts depth-of-field) is most important. In shutter priority mode, the photographer has decided that shutter speed (which impacts subject blur) is most important.

Image-taking Flowchart

Based largely on Bryan Peterson's wonderful books (such as Understanding Exposure, a great resource for learning photography), I've broken down images into five types:

  • everything in focus
  • maximal subject sharpness
  • sharp subject and blurry background
  • frozen action
  • show movement

The following flowchart explains the camera settings that create each type of image:

Image-taking Workflow

Image-taking Workflow

Everything in Focus

If you want everything in the frame to be in focus (as you usually do when taking scenic or landscape images), switch your camera to aperture priority mode and configure a large F number such as f/18, f/22, or even higher. (For the purposes of this article, it's not important what those numbers actually mean.) For example, in the following scene from Algonquin Provincial Park, I wanted both the foreground rock and background trees to be in focus so I configured my aperture to f/18. This meant that the camera had to use a shutter speed of 15 seconds to ensure that enough light hit the sensor, which necessitated the use of a tripod.

Everything in focus. f/18; 15 seconds; ISO 100

Everything in focus. f/18; 15 seconds; ISO 100

When in aperture priority mode, the configured aperture can drastically impact the resulting image. For example, here are two images of the same scene taken in aperture priority mode, the first at f/32 and the second at f/4.5 (the smallest F number allowed by the lens that was used):

Aperture is important! F/32

Aperture is important! F/32

APERTURE IS IMPORTANT! F/4.5

APERTURE IS IMPORTANT! F/4.5

Only you know which of these images you want. Take control - don't let your camera decide!

Maximal Subject Sharpness

Maximal sharpness depends on the lens, but a good rule of thumb is that a medium aperture around f/5.6, f/8, or f/11 is best. When I'm looking for birds, my primary concern is getting the subject as sharp as possible, so I usually configure my camera to use f/8 in aperture priority mode. That was my setting when I found this yellow-rumped warbler:

Maximal subject sharpness. f/8; 1/1600 second; ISO 800

Maximal subject sharpness. f/8; 1/1600 second; ISO 800

Sharp Subject & Blurry Background

If you really want to blur the background to make the subject stand out, use aperture priority mode and configure a small F number such as f/4, f/2.8, or lower if your lens supports it. For example, I didn't want the background greenery to distract from the main subject in the following image so I used f/4:

Blurred background. f/4; 1/500 second; ISO 200

Blurred background. f/4; 1/500 second; ISO 200

When using a small F number, the depth-of-field is extremely narrow (notice how the crane's neck and the front of its bill are out of focus). Therefore, it's important to focus properly. With animals, the point of focus should usually be the eye as it is above.

Freezing Action

If you want to freeze action, shutter speed becomes more important than aperture so switch to shutter priority mode and configure a fast shutter speed of 1/1000 second, 1/2000 second, or even faster. Two such cases that arise in nature photography are when you want to freeze movement of an animal or show water droplets:

Frozen Action: f/8; 1/2000 second; ISO 800

Frozen Action: f/8; 1/2000 second; ISO 800

Frozen action: f/8; 1/2500 second; ISO 800

Frozen action: f/8; 1/2500 second; ISO 800

These images would have a different feel with a slower shutter speed - the bird's wings and water would be blurred. Maybe that's what you want but how is your camera supposed to know? Take control - don't let your camera decide!

Show Movement

If you want part of an image to be blurred to show movement, shutter speed is again more important than aperture so switch to shutter priority mode and configure a slow shutter speed such as 1/80 second or 1/20 second. When using slow shutter speeds, it's absolutely vital to use a tripod or other support to ensure the camera remains motionless.

You frequently want to show movement with waterfalls and much experimentation is required. The "correct" shutter speed to use depends on how fast the water moves and your artistic goal. Here are two images of the same scene taken with different shutter speeds:

MOVEMENT: f/13; 1/40 second; ISO 1600

MOVEMENT: f/13; 1/40 second; ISO 1600

MOVEMENT: F/13; 0.4 SECONDs; ISO 100

MOVEMENT: F/13; 0.4 SECONDs; ISO 100

Which image do you prefer? I like the one on the right but that doesn't really matter. What matters is that in shutter priority mode, you get to choose which image you take. In automatic mode, you don't get to decide.

Here are some other moving water images with various shutter speeds:

Movement: f/13; 1/8 second; ISO 200

Movement: f/13; 1/8 second; ISO 200

MOVEMENT: F/13; 1/6 SECOND; ISO 800

MOVEMENT: F/13; 1/6 SECOND; ISO 800

MOVEMENT: F/13; 1/2 SECOND; ISO 100

MOVEMENT: F/13; 1/2 SECOND; ISO 100

If you're at a waterfall at night, you may need a very long exposure. For example, this image required an exposure of six seconds:

MOVEMENT: f/20; 6 seconds; ISO 100

MOVEMENT: f/20; 6 seconds; ISO 100

I hope this article has encouraged you to move away from automatic mode. Try aperture priority and shutter priority and keep making great images!

Geotagging Images in Lightroom

This post explains geotagging in Lightroom, the process of adding location metadata to images. Geotagging is a significant part of my photography workflow. Lightroom's full integration with Google Maps is one of my favourite features. Maps inspire me. There's always another remote road to drive, spectacular vista to encounter, and enticing trail to hike.

Aside from its "cool" factor, geotagging is useful because it's one of the main ways I search for images. I also search based on the date an image was taken (thanks to my folder and file structure) or based on an image's subject (after I've added keywords, which I'll write about in a separate post).

Geotagging is done in Ligthroom's Map module. After you've geotagged your images, that module displays a map with pins showing where your images were taken:

Lightroom's Map module, showing where my images were taken

Lightroom's Map module, showing where my images were taken

Given my residence, it's not surprising that most of my images were taken in North America. You can zoom in on the map to see more detail:

LIGHTROOM'S MAP MODULE, SHOWING WHERE MY IMAGES WERE TAKEN in western Canada and the Territories

LIGHTROOM'S MAP MODULE, SHOWING WHERE MY IMAGES WERE TAKEN in western Canada and the Territories

You can click on the markers to highlight the images taken at that location but the coolest feature is Lightroom's ability to show you only those images that were taken on the visible area of the map. For example, suppose I want to find the images I took near Stewart, British Columbia. If I remembered when I was there, I could browse my folders by year and date. If I don't remember when I was there, I can type "Stewart, BC" into the location search box, zoom as appropriate, and then click on Visible on Map to enable that filter:

Lightroom's "Visible on Map" FEature

Lightroom's "Visible on Map" FEature

Amazing! Only the 26 images visible on the map are selected. I can then navigate to the folder by right-clicking on any image and selecting Go to Folder in Library.

Instructions

Some cameras (such as the Canon 6D) can automatically add location metadata to every image. However, I turn that feature off because it uses a lot of battery power (even when the camera is turned off). It's so easy to geotag in Lightroom that I don't feel that I'm missing anything. If I'm at a location that I think might be hard to remember, I can always take a photo with my iPhone and have it record the location without wasting my camera's battery.

The following screenshot shows Lightoom's Map module and identifies the features that let you geotag images:

Geotagging in Lightroom: Suggested Location Metadata

Geotagging in Lightroom: Suggested Location Metadata

To geotag images in Lightroom:

  1. Switch to the Map module (A).
  2. Select all images taken at a location (B). My folder structure makes this easy. In the screenshot, I'm in a folder where all images were taken at the same location (Wellington Harbour) so I can Edit→Select All.
  3. Use the search box (C) and/or change the map style (D) to zoom to the exact location.
  4. Right-click on the map where the images were taken and select Add GPS Coordinates to Selected Photos. This should provide suggestions for ISO Country Code, Country, State/Province, City, and Sublocation. Suggestions appear in light grey (E). If suggestions don't appear, you need to enable the feature: In Edit→Catalog Settings→Metadata, make sure that Lookup city, state, and country of GPS coordinates to provide address suggestions is checked.
  5. Confirm the suggestions by clicking on the field name (such as ISO Country Code) and selecting the correct value.
  6. Manually enter a sublocation. For example, I want the sublocation for these images to be Wellington Harbour rather than the suggested Bloomfield.

After values are entered into a location field (either by confirming a suggestion or manually entering a value), the light grey text turns white (F):

GEOTAGGING IN LIGHTROOM: ConfirmED LOCATION METADATA

GEOTAGGING IN LIGHTROOM: ConfirmED LOCATION METADATA

Voila! You're done! Wasn't that easy? Now you can browse Lightroom's map, marvel at the places you've been, and dream of where to go next!

Importing Images to Lightroom

This post describes how I import images to Adobe Lightroom. It's a vital part of my photography workflow.

Lightroom's Import button is only available in the Library module, so I go there and click it to open the Import Dialog:

Adobe Lightroom's IMPORT DIALOG

Adobe Lightroom's IMPORT DIALOG

The Import Dialog has four main sections:

  1. Source
  2. File Manipulation
  3. Destination
  4. Option Panels

Each section is explained below.

Source

I select the drive of my camera's memory card and check the box that ejects the drive after the import is complete. As soon as the import is complete, I put the card back in my camera to minimize the chance of in-the-field-with-no-memory-card-in-my-camera syndrome.

File Manipulation

I select to copy as DNG unless I expect to delete many photos. In that case, it's more efficient to copy the files as is first, delete the ones I don't need and then convert the remaining files to DNG.

Destination

I select the folder for the correct year on the Photo Master external hard drive. Click here for details on the folders and files I use to keep my images organized.

Option Panels

File Handling

Adobe Lightroom's Import Dialog: FILE HANDLING PANEL

Adobe Lightroom's Import Dialog: FILE HANDLING PANEL

I select the following in the File Handling panel:

  • Build 1:1 Previews - I prefer to build 1:1 previews during the import process to minimize delays during development.
  • Don't Import Suspected Duplicates - I don't want a second copy if an image is already in the Lightroom catalog.
  • Make a second copy - I make a backup copy during the import process in case I mistakenly delete a file. Click here for more details on my backup workflow.

File Renaming

ADOBE LIGHTROOM'S IMPORT DIALOG: FILE RenamING PANEL

ADOBE LIGHTROOM'S IMPORT DIALOG: FILE RenamING PANEL

In the File Renaming panel, I select the following:

  • Template - I rename files using a template that includes the date each image was taken, the camera body used to take it, and the filename as recorded by the camera. Click here for details on the folders and files I use to keep my images organized.
  • Make extensions lowercase - This is a personal preference - I don't want my file extensions yelling at me.

Apply During Import

ADOBE LIGHTROOM'S Apply During Import PANEL

ADOBE LIGHTROOM'S Apply During Import PANEL

In the Apply During Import panel, I select the following:

  • Develop Settings - I use a develop preset to automatically apply my most frequently-used edits to every image - adding clarity, vibrance, saturation, and sharpening; reducing noise; enabling profile corrections, and removing chromatic aberration.
  • Metadata - I use a metadata preset that adds my name, city, website, email address, and copyright details into every image. Doing so makes it slightly easier to catch someone who uses one of my images without my permission.

Destination

ADOBE LIGHTROOM'S IMPORT DIALOG: Destination PANEL

ADOBE LIGHTROOM'S IMPORT DIALOG: Destination PANEL

In the Destination panel, I select that images get put into a subfolder and are organized into one folder. Click here for details on the folders and files I use to keep my images organized.

Backup Workflow

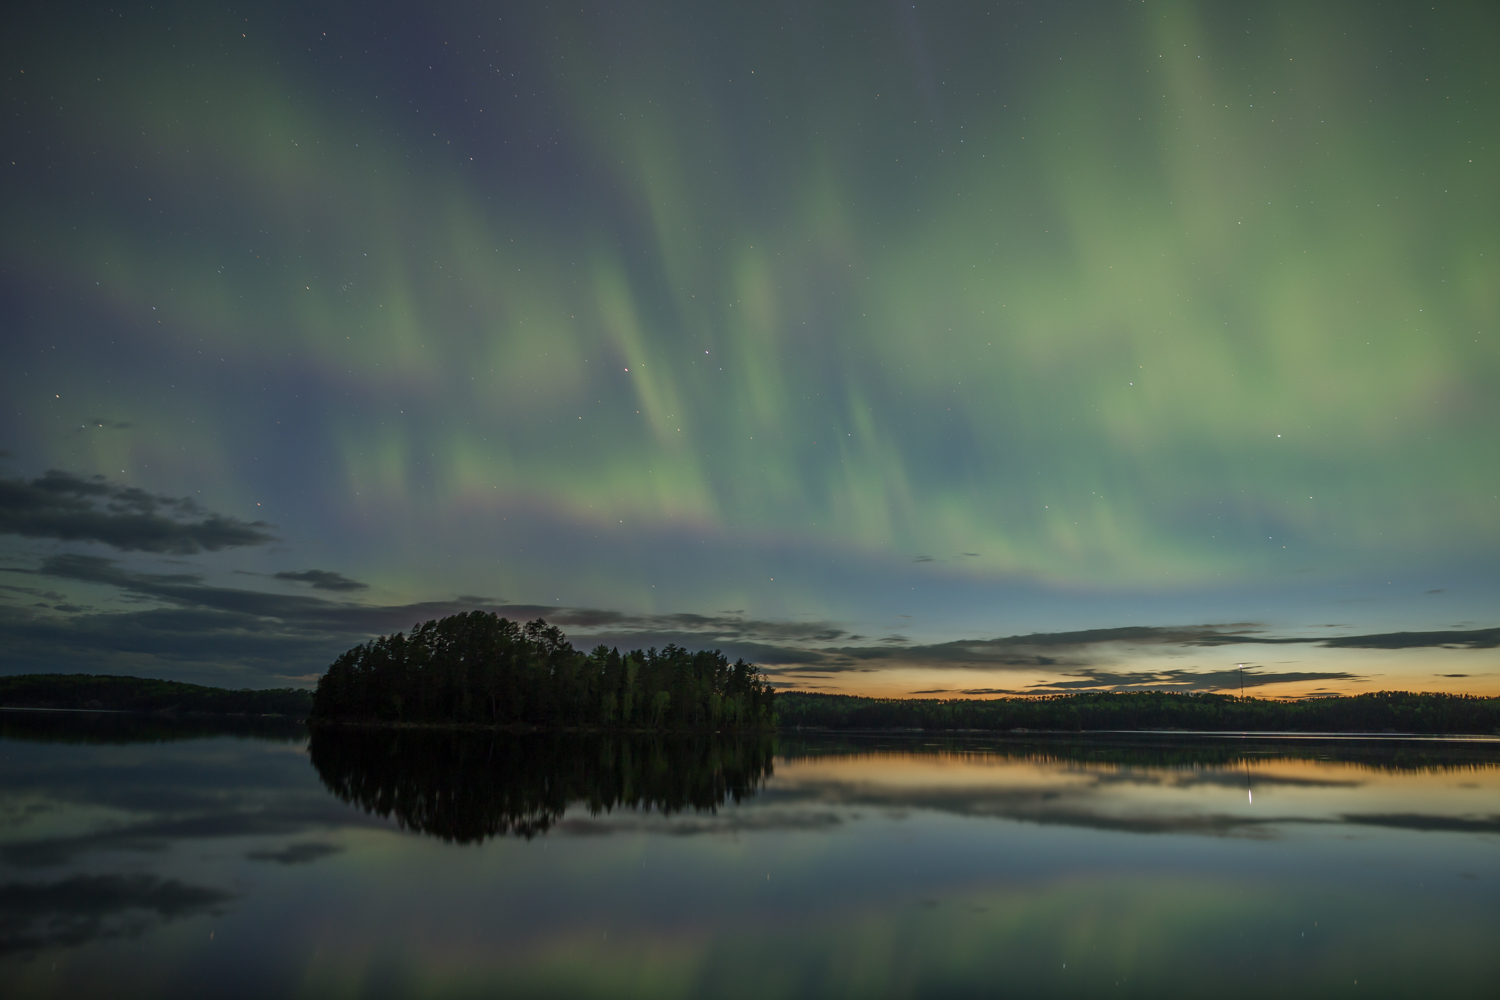
Let's talk about everyone's favourite topic - backup. Wait? Backup isn't your favourite topic? Tough cookies! It's something you've got to do. How would you ever forgive yourself if you lost that blurry photo of the most common bird in the world? I think Abraham Lincoln said it best: There are those who have experienced hard drive failure and those who will experience hard drive failure.

External Hard Drives

I use five external hard drives:

  • master drive
  • onsite backup drive
  • offsite backup drive #1
  • offsite backup drive #2
  • travel drive

Master Drive

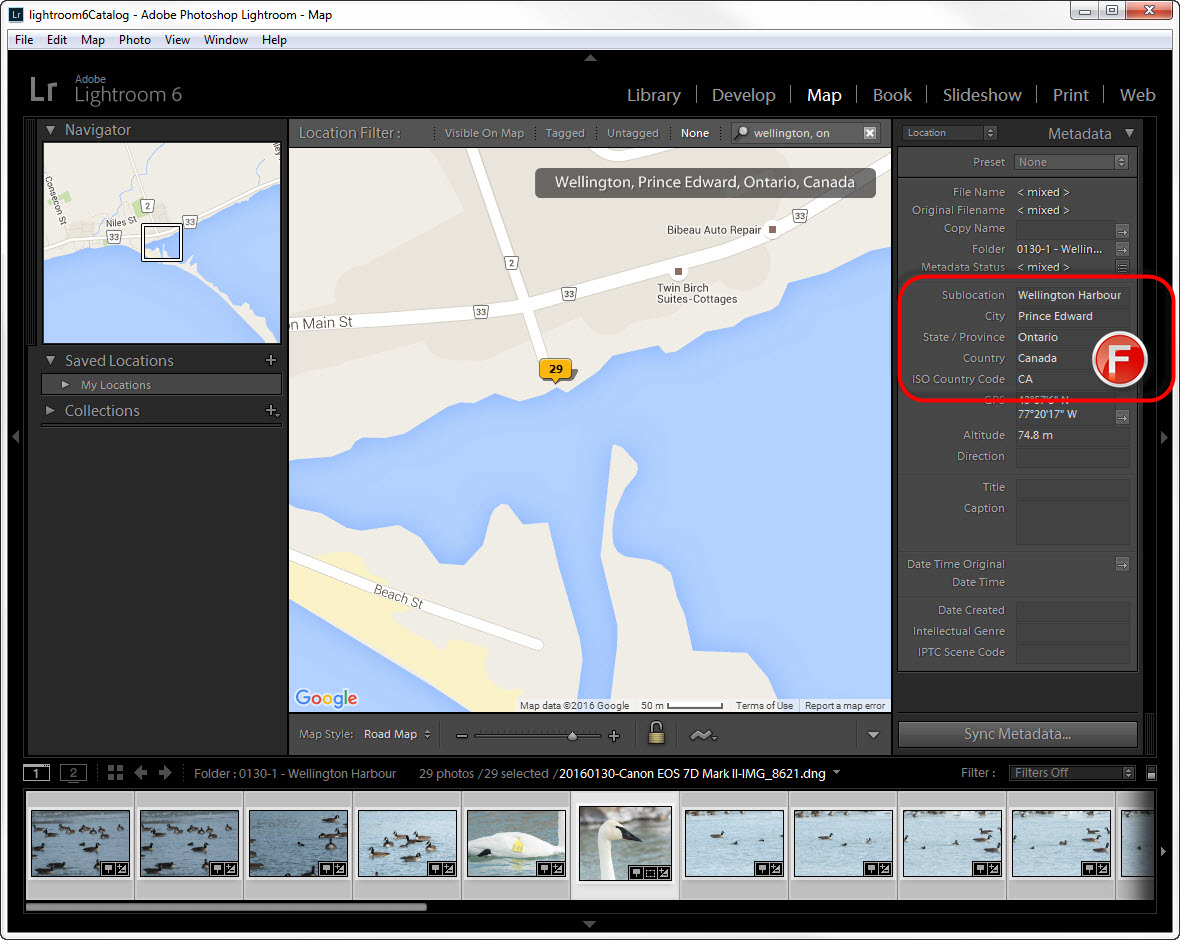
This drive is permanently connected to my home computer and stores raw image files and my Lightroom catalog. (Click here for an explanation of the folders and files I use to keep my images organized.)

The master drive is where images are imported when I return from taking photos. (Click here for my photography workflow.) If I didn't take my laptop (such as on a day trip), raw image files are imported directly from the memory card on my camera. If I took my laptop, images are exported as a Lightroom catalog from the travel drive (see below) before the catalog is imported to the master drive.

Onsite Backup Drive

This drive is permanently connected to my home computer and stores backup copies of everything I value. I use Windows Task Scheduler to ensure that my data is automatically backed up every night by SyncToy, a free tool you can download from Microsoft.

SyncToy uses pairs of folders (called the left and right) and actions (synchronize, contribute, or echo). The action defines how changes on the left folder are reflected on the right folder. For backup, use an action of echo to ensure that all changes to the master data appear on the backup drive.

I have four SyncToy folder pairs - one each for the daily backup of my photography files, video files, music files, and other data files.

Offsite Backup Drives

At the end of each month, I manually create on-the-fly SyncToy folder pairs with an action of echo to copy to an offsite backup drive the same files that are backed up to the onsite backup drive. After the monthly backup is complete, I swap the backup drives. The newly created one is stored offsite; the one that was offsite is brought home to prepare for the next monthly backup.

It's important to keep a backup offsite. Otherwise, you have a single point of failure - you're susceptible to theft, fire, and other natural disasters. At the very least, keep the offsite backup drive in a different room than the main computer.

Online Backup

I once used an online backup service that backed up my most important data to "the cloud". However, I stopped using it for several reasons:

  • The service was more expensive per year than the cost of several external hard drives that will last for many years. That doesn't count the additional cost for bandwidth when I exceeded my monthly upload limit after returning from a long trip.
  • The amount that could be backed up was limited so I constantly had to redefine what data was most important.
  • It slowed down my computer.
  • It would have taken too long to get my data back after a disaster. If disaster occurs, I can just pick up my offsite backup drive and copy the data to a new computer. With backups on the cloud, I would either need to download everything (slow and possibly costly) or arrange for my data to be mailed.

All that being said, I keep my offsite backups in the same city as my home computer so my backup plan leaves me susceptible to city-wide destruction. I choose not to worry about such things. If my city is destroyed, I'll lose my raw files and my Lightroom catalog but at least high-resolution JPEG images will be available on SmugMug (see below).

Travel Drive

When I travel with my laptop, I take a special drive to ensure that the drives at my home remain pristine. The travel drive is also sturdier to withstand the rigors of travel. On-the-fly SyncToy folder pairs with an action of echo are used to populate the travel drive before I leave on a trip.

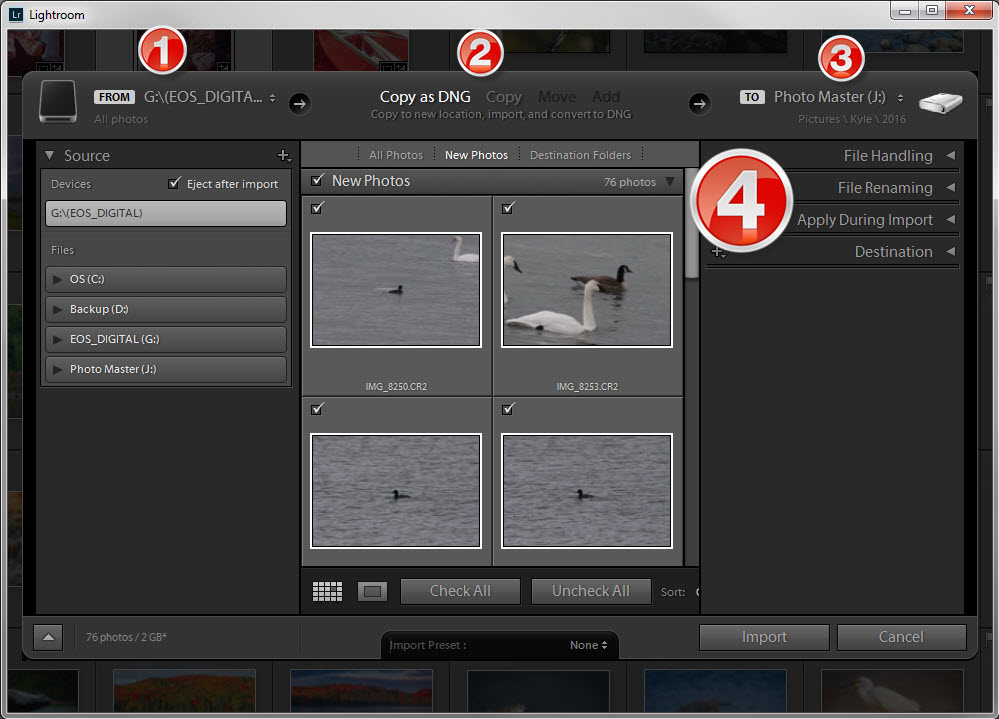
When travelling, I use Lightroom on my laptop to import image files to the travel drive and use Lightroom's "Make a second copy during import" option to backup the raw files to my laptop's hard drive. Even with raw images stored on three locations (camera, travel drive, and laptop hard drive), I still have a single point of failure because I keep all of those items in my car. If it was stolen or caught fire, I would lose all my images. To eliminate that single point of failure, I do the following:

  • Bring several SD cards, envelopes, and stamps when I travel.
  • Periodically export my latest images as a Lightroom catalog to an SD card.
  • When an SD card is close to full, mail it to my house. When I get home, the backup SD cards are already there if I need them.

Once home, I use Lightroom to export as a catalog the folder on the travel drive that has images from my trip. I then use Lightroom to import that catalog to my master drive.

Other Backup Concerns

SmugMug

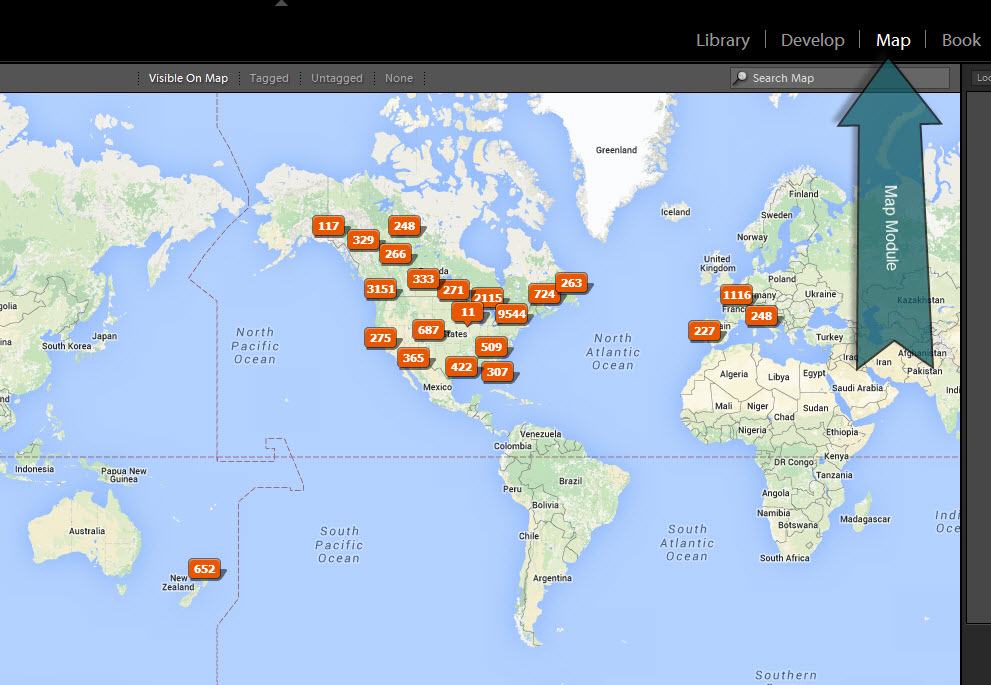
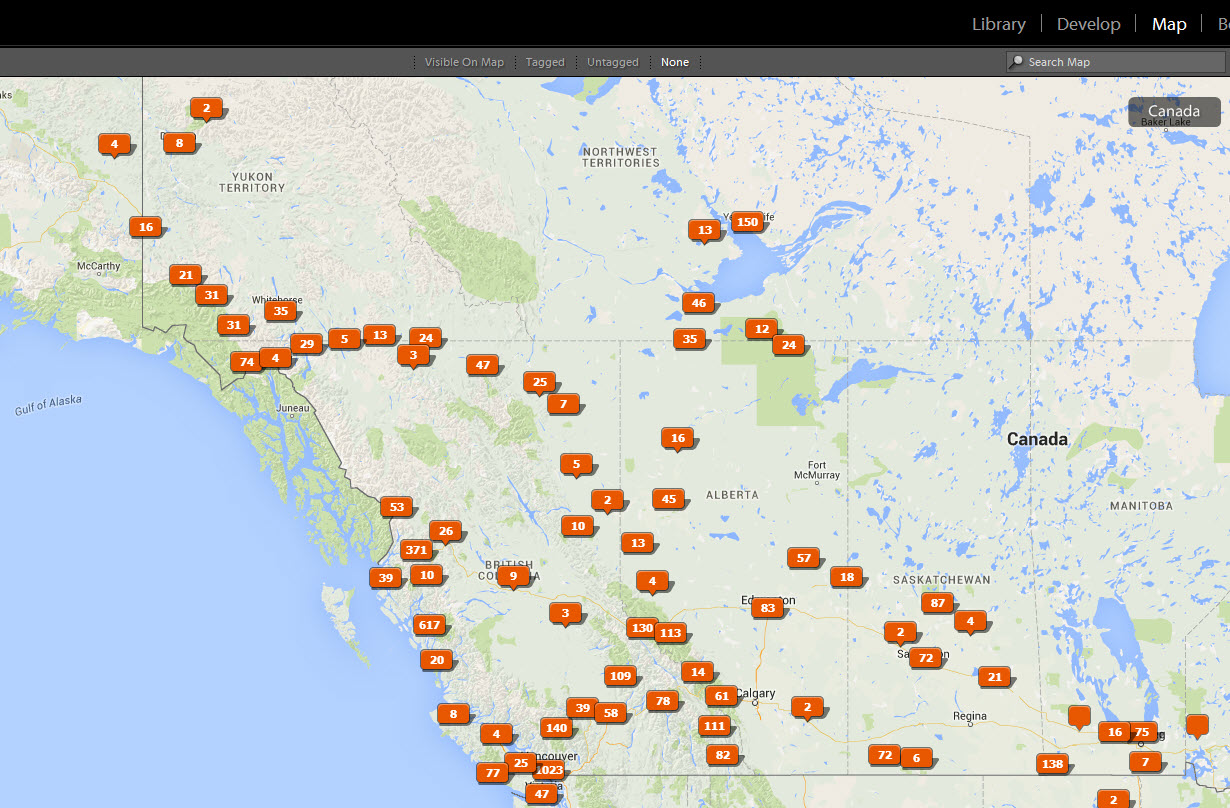
I post all of my images to SmugMug, a photo-sharing website and image hosting service. SmugMug doesn't accept raw files so I post my images as high-resolution JPEG files instead. Lightroom's SmugMug plugin makes this really easy - it creates JPEG files on-the-fly so I don't need to store them anywhere. Once the JPEG files are uploaded to SmugMug, poof! They're gone.

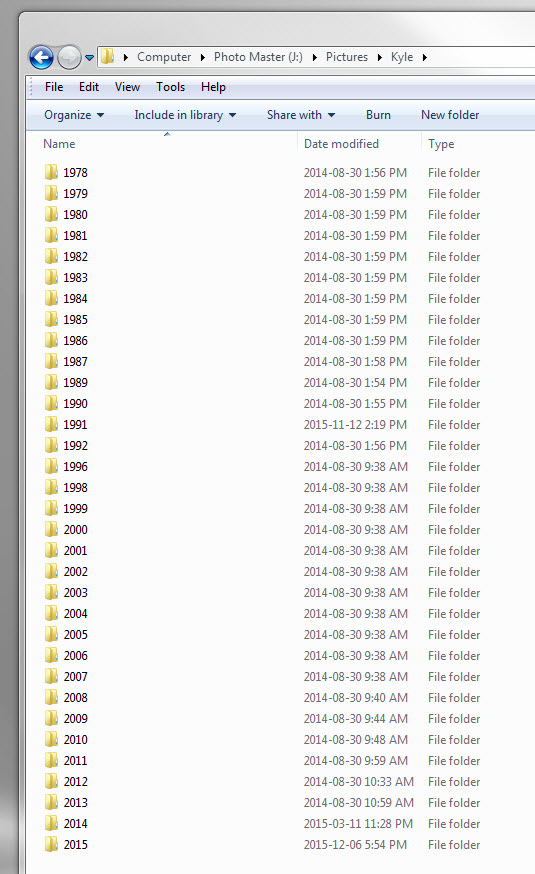
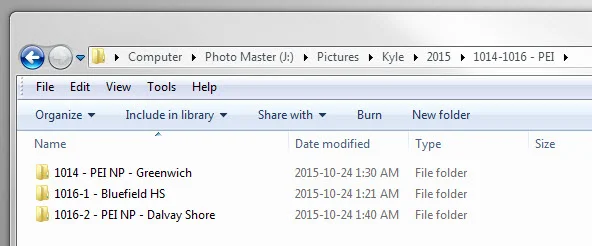
My SmugMug galleries mimic the folder structure on my master drive. There's a top-level folder for each year and a gallery for each event that year. These galleries are private; a person requires a link from me to see them. For example, if I have images of a bird that I can't identify, I send the link to more experienced birders.

Lightroom Catalog Backups

I configure Lightroom to prompt me to back up my catalog every time I exit the program (Edit→Catalog Settings→General→Backup). This backup takes a while so I ignore the prompt most of the time. However, it serves as a reminder to back up the catalog at least once a week. I've never had to use this backup (because the catalog is included in my nightly backup), but you can never have too many backups!

Lightroom Presets Storage

I configure Lightroom to store my presets with my catalog (there's a checkbox under Edit→Preferences→Presets→Location). That way, the work I've spent defining presets (for example, those for developing, adding metadata, and renaming files) isn't lost if my computer dies or I need to reinstall Lightroom.

This approach works for me because I only use one Lightroom catalog. If you use presets that apply to more than one catalog, you need a different approach.

Google Drive

I use Google Drive extensively. It's a fantastic file storage and synchronization service that automatically saves changes to the cloud as you type. It allows you to create spreadsheets, word processing documents, presentations, drawings, maps, and other files using only a web browser (there's no need for external programs like Microsoft Word or Microsoft Excel). Google Drive has several enormous benefits:

  • You never need to back up its files - they are automatically saved on the cloud as you type.
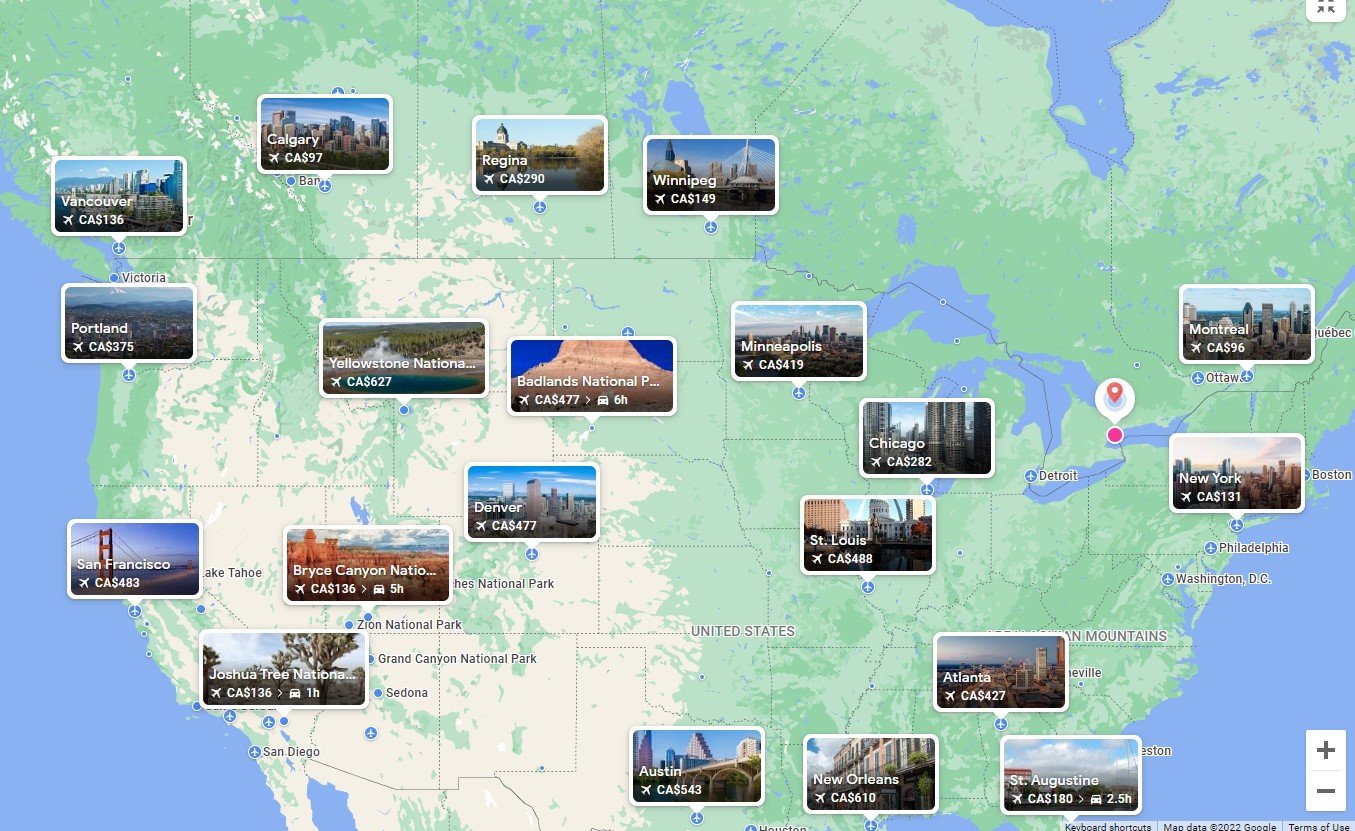
  • Files are automatically synchronized between devices. If you install Google Drive on all your devices, changes you make on one device automatically appear on the others. For example, I create a Google Sheet (the Google Drive equivalent of a Microsoft Excel spreadsheet) to plan potential stops on a trip. If I edit the document on my computer, I automatically see those changes on my laptop (or even on my phone).

Summary

That's how I ensure that I don't lose images. If you have any suggestions on backup, please comment here or contact me.

Photography Workflow

Here's my photography workflow. Your mileage may vary. I'll describe the steps in further detail in other posts.

Remember, images aren't going to organize themselves! It's a good feeling when you can easily find that picture of grandma in a onesie doing a handstand.

  1. Go somewhere. Leave the warm place where your computer is. Maybe go outside. It'll be okay. I promise.
  2. Using your camera, clear the memory card. Only do this when you're sure that the images have already been copied to your computer and backed up. I've written a detailed post on my backup workflow.
  3. Take photos. If the camera supports it, shoot raw. Learn to move away from automatic mode - see my image-taking workflow.
  4. Go back to where your computer is. Ah, the indoors. So warm. So safe. So filled with a computer.
  5. Remove the card from the camera. I know that you can attach your camera to the computer using a fancy cable, but that wastes your camera's battery. Only turn on your camera when you're going to use it to capture stunning images of subjects such as that decaying house plant in the corner.
  6. Import the images to Lightroom. Copy the files rather than move them; keep the originals on the memory card as a backup until you are absolutely certain that you have other backup copies, and preferably an offsite backup. I've written detailed posts on importing images to Lightroom and my backup workflow.
  7. Put the card back in the camera. This step might seem obvious but it's no fun when you forget. 100% of my sasquatch encounters have occurred when my camera's memory card was in my computer.
  8. Organize images in Lightroom. Delete photos that you will never need (Be careful! I once deleted blurry images of a rare bird that will likely never be seen again. My photos could have helped with the identification.) Create new folders to keep files organized. I've written a detailed post on the folders and files I use to keep my images organized.
  9. Edit images in Lightroom. Do whatever you do to make your images worthy of publishing. Maybe increase exposure in the shadows, decrease exposure in the highlights, or add an amount of saturation that will later seem as subtle as a sledgehammer.
  10. Add keywords to images in Lightroom. How else are you going to find those images of that weird lizard you took two years ago?
  11. Geotag images in Lightroom. How else are you going to find those photos you took at that awesome sewage lagoon in northern Ontario? I've written a detailed post on geotagging images in Lightroom.
  12. Flag the very best images. Flagging the best images makes it easier to find them later.
  13. Publish images to SmugMug from Lightroom. How else are your adoring fans going to see your work?
  14. Use Lightroom collections. For example, I have one collection for my all-time favourite bird images, another for my favourite mammal images, and another for my favourite scenery images.

Finding Images

Thanks to the above workflow and Lightroom's features, I have many ways to find images:

  • Browse folders by year and event
  • Filter to only show flagged photos
  • Search by keyword in Lightroom's Library module
  • Search by location in Lightroom's Map module
  • Browse my Lightroom collections
  • Use Lightroom's on-the-fly Quick Collection
  • Use a Lightroom smart collection. I have a temporary smart collection that I edit when I want to combine search critera. For example, suppose I want to find flagged bear images taken with a slow shutter speed. That's three criteria:
Using a Lightroom Smart Collection to find flagged bear images taken with a slow shutter speed

Using a Lightroom Smart Collection to find flagged bear images taken with a slow shutter speed

Keeping Images Organized: Folders & Files

This post demonstrates the folders and files I use to keep my images organized.

I do everything related to image files (such as creating folders and moving image files) from within Adobe Lightroom. I’ll cover how in another post. This post shows what things look like after using Adobe Lightroom. Let’s start by looking at my photo master external hard drive in Windows Explorer:

The contents of the top-level of my photo master external hard drive (J:).

The contents of the top-level of my photo master external hard drive (J:).

At the top level, the drive has two folders, one for my Lightroom catalog and one for my picture files. There’s also a funny-looking file that Microsoft SyncToy uses to keep track of things. SyncToy is the key component of my backup strategy and I'll cover that in another post. In this post, we’ll only look inside the Pictures folder:

The contents of J:\Pictures

The contents of J:\Pictures

Within the Pictures folder, I use one top-level folder for each photographer. We’ll focus on images that I’ve taken, in the Kyle folder:

The contents of J:\Pictures\Kyle

The contents of J:\Pictures\Kyle

In the Kyle folder, I use one subfolder for each year. Note that I don't let Lightroom decide on my folders. I move my files around manually because I want the folder to represent when the image was originally taken. For example, if I scan an image from 1987, I want the folder to be 2016 (which Lightroom would think to use) and not 1987.

Within each year’s subfolder, I use further subfolders for each location:

The contents of J:\Pictures\Kyle\2015

The contents of J:\Pictures\Kyle\2015

For example, I was in Manitoba on October 26, 2015, so I have a folder named 1026 - MB within the 2015 folder. If one trip has many locations, I use further subfolders. For example, I was in Prince Edward Island (PEI) from October 14-16, 2015, so I have a folder named 1014-1016 - PEI within the 2015 folder:

The contents of J:\Pictures\Kyle\2015\1014-1016 - PEI

The contents of J:\Pictures\Kyle\2015\1014-1016 - PEI

I took images at three locations in Prince Edward Island, so that folder contains three subfolders.

I use two digits for the month followed by two digits for the day so that folders always appear in chronological order even when sorted alphabetically. For example, I use 0117 for January 17 and 0308 for March 8. When a day has more than one location, I put a number after the date to indicate the order. For example, I took images at two locations in PEI on October 16, so I have folders that start with 1016-1 and 1016-2. The numbers after the date ensure that these subfolders always appear in chronological order.

Files

Now that we’ve talked folders, let’s talk files. Each folder contains DNG (digital negative) files. I use Canon camera bodies, shoot raw (You should too if you can!), and use Lightroom to convert from Canon's proprietary CR2 raw format to the non-proprietary DNG raw format. Here's a folder that holds images I took on January 3, 2016 on Amherst Island:

The contents of J:\Pictures\Kyle\2016\0103 - Amherst Island

The contents of J:\Pictures\Kyle\2016\0103 - Amherst Island

Filenames have the format DATE-CAMERA_BODY-IMG_XXXX:

DATE is in the format YYYYMMDD where YYYY is the year, MM the month, and DD the day when the image was taken. Given my folder structure, it may seem redundant to include a date in the filename but doing so has several benefits:

  • It avoids filename conflicts when images are combined into a single folder (for example, when exporting a Lightroom collection). My cameras roll over image numbers every 10000 images so without a date, I would have more than one file named IMG_1234.CR2.
  • It ensures that image files appear in chronological order when they are arranged alphabetically in a single folder.
  • It allows you to simultaneously see the date of an image and the image's metadata such as shutter speed, aperture, and ISO in Lightroom's Loupe Info Overlay.

CAMERA_BODY records the camera body used to take the image. For example, Canon EOS 7D Mark II appears when an image was taken with that camera body. This is done to avoid filename conflicts if I happen to take two images on the same day with two different camera bodies that have the same image number. Without including the camera body in the filename, I could end up with two files named 20150117-IMG_1234.CR2. It’s unlikely but possible and I need a workflow that always works, not one that almost always works. Note that I will need to adopt a different naming convention if I ever have two camera bodies of the same model. If that happens, I could use the camera's serial number but that approach doesn't work with images taken on my iPhone.

IMG_XXXX is the filename created by the camera.

Note that filenames don't indicate the subject of an image (such as an animal species, person, or location) or where the image was taken. Instead, I use Lightroom keywords to record which people and animals are in my photos and Lightroom geotagging to record where my photos were taken. I'll discuss both in another post.

Rule Number One: Have Your Camera Ready!

Why do you take photos of birds? My reasons have changed over time but one recent special bird reminded me why I started.

Having only been a serious birdwatcher for a few years, I'm a novice. I started taking photos to help me identify the species of my subjects. For example, I found it difficult in the field to see the subtle cap of an orange-crowned warbler but on my computer monitor, with the image zoomed to 400%, the speck of burnt orange nearly lept off the screen!

Since my first forays into bird photography, I have grown to appreciate its artistic side. I aim for photos that aren't just for identification purposes. I want a clean background, a razor sharp subject, and perfect lighting. All of that was completely irrelevant on May 14, 2014 at Prince Edward Point National Wildlife Area in Ontario's Prince Edward County, known to us locals as "the county".

I had arrived early for a day of birdwatching and photography. As usual, it was beautiful in the county and the area was abuzz with bird activity. Scarlet tanagers, evening grosbeaks, white-throated sparrows, blue-gray gnatcatchers, and warblers (so many warblers!) had provided ample opportunity for photographic practice. I was ready for an early lunch when I stumbled upon a few sparrows.

The sparrows were on a short gravel sideroad leading to my favourite lunch spot at Prince Edward Point, overlooking Lake Ontario. I already had a soft spot for that part of the wildlife area because of the snowy owl a friend and I had seen there in the winter. Little did I know that among the sparrows was a bird that definitely trumped a wandering white owl!

I had two camera bodies with me. One was inaccessible while driving, in the back of my vehicle connected to a long lens on a tripod. For emergency photographic purposes, I had another body attached to a shorter lens in the front passenger seat. The emergency camera was as ready to go as possible. It was turned on and the lens cap was off. This was a trick I learned on the Alaska Highway, where roadside wildlife viewing is spectacular but fleeting.

One of the sparrows vaguely resembled a junco and didn't look like the rest so I put my emergency camera into action. I took the first shot through my dingy windshield.

Aberrant dickcissel?, Prince Edward Point National Wildlife Area, Ontario, Canada

Aberrant dickcissel?, Prince Edward Point National Wildlife Area, Ontario, Canada

After the documentary shot, I angled my SUV and rolled down my window to get clearer images.

Aberrant dickcissel?, Prince Edward Point National Wildlife Area, Ontario, Canada

Aberrant dickcissel?, Prince Edward Point National Wildlife Area, Ontario, Canada

Aberrant dickcissel?, Prince Edward Point National Wildlife Area, Ontario, Canada

Aberrant dickcissel?, Prince Edward Point National Wildlife Area, Ontario, Canada

Aberrant dickcissel?, Prince Edward Point National Wildlife Area, Ontario, Canada

Aberrant dickcissel?, Prince Edward Point National Wildlife Area, Ontario, Canada

Aberrant dickcissel?, Prince Edward Point National Wildlife Area, Ontario, Canada

Aberrant dickcissel?, Prince Edward Point National Wildlife Area, Ontario, Canada

Within 40 seconds, the strange bird flew across the road.

Aberrant dickcissel?, Prince Edward Point National Wildlife Area, Ontario, Canada

Aberrant dickcissel?, Prince Edward Point National Wildlife Area, Ontario, Canada

Not knowing at the time if it was a rarity, I didn't try to relocate it. Plus, my peanut butter sandwiches weren't going to eat themselves.

Even as a novice birder, I knew that dark-eyed juncos have many variants so my expectation was that I would be able to identify the subspecies. When my images didn't look like any of the subspecies, I moved on to sparrows. Again, none really matched the bird in my pictures. I was stumped. I asked my dad, other local experts, and the head bander at Prince Edward Point. They were all stumped. The head bander even tried unsuccessfully to capture the bird to get a closer look! I sent the images to my brother, a lifelong birder and the executive director and senior scientist at Atlantic Canada Conservation Data Centre. He was stumped too! What was this thing?

I posted the images to whatbird.com and asked for assistance. Lots of possibilities were suggested - a vagrant sparrow, a sparrow/junco hybrid, an aberrant dickcissel, a dickcissel hybrid. Dickcissels breed in South America so that led to lots of interesting hybrid theories. Eventually Alan Wormington reached out and posted my images to the ABA ID Frontiers mailing list. There, bird experts like David Sibley and Peter Pyle got involved. I was fascinated! Famous birders were discussing my bird!

The most intriguing aspect of the discussion occurred when a resemblance between my bird and a nearly 200-year-old lithograph was noticed. In 1834, ornithologist John James Audubon painted and described a mystery bird he called Townsend's bunting. One of the first to notice the similarities between my bird and Audubon's depiction of the Townsend's bunting was Denis Lepage, senior scientist at Bird Studies Canada. In fact, Denis was so taken by this peculiar bird that he wrote an article titled Townsend's Bunting in Ontario? for Birding magazine (a publication of the American Birding Association). Thanks Denis! The story was also covered on the back cover of BirdWatch, a magazine published by Bird Studies Canada.

Nothing like a Townsend's bunting has been seen since the 1830s. Could I possibly have seen a species not recorded since then? Alas, almost definitely not. We'll never know for sure what it was, but the general consensus is that it was an aberrant dickcissel with a number of pigment abnormalities. Any dickcissel is rare in Prince Edward County so I'm happy. However, whenever I visit Prince Edward Point, I drive on my special gravel sideroad and I remember the day that I possibly saw a species unseen by human eyes for almost 200 years!

Free and easy online map making!

Have you ever wanted a free online tool to create maps? Well want no more!

I've started to use batchgeo.com and it's great! You create a spreadsheet of locations offline (I use Google Sheets; Microsoft Excel also works), paste the spreadsheet contents into the box on the batchgeo.com homepage, click the Map Now button and, voila!, you've got yourself a pretty sweet map with your locations as pushpins overlaid on top of Google Maps.

The maps have other features:

  • Locations can be categorized so that the pushpins are different colors.
  • The maps can be embedded on other webpages, such as you see below.
  • Users of the map can select which category of locations to display. When there are 26 or fewer locations displayed, the pushpins automatically get lettered from 'A' to 'Z' according to the order of locations in the spreadsheet.
  • You can name the location differently than it appears in Google Maps.
  • You can attach a URL to each location to provide further information.

For example, I made a map of the places I stayed during my 2014 road trip from Belleville, Ontario to Vancouver, British Columbia. I used different categories for each phase of my trip (Belleville to Prince Rupert, Grizzly Bear Tour, Prince Rupert to Vancouver, and Vancouver to Belleville). When only one category is selected, the locations are lettered in the order that I stayed at them. I attached links to park websites for the parks I stayed at.

Neato!

View Kyle's 2014 Road Trip in a full screen map

Yukon Trip - Days 27-30: Caterpillars on the Face and the Parking Nightmare

June 21, 2013 - Day 27

Stewart, British Columbia is remarkably picturesque and I wanted to stay longer. However, for the first time in weeks, I actually had a deadline. Shudder! I had to be at the University of British Columbia in Vancouver in four days and I didn't want to rush.

On my way east from Stewart, I stopped on Highway 37A for one final glimpse of the majestic Bear Glacier before reaching Highway 37 proper. One black bear greeted me beside the highway just west of Meziadin Junction and another crossed the road a few hours later near Kitwanga. The latter was an obviously wounded individual; it hobbled across the highway into the forest without putting any weight on one of its hind legs. It was a good reminder that many animals struggle daily with mere survival. Comfort is strictly a human invention.

I spent most of the day driving and had no particular camping spot in mind when the day began. The monotony got to me around 6:00 PM so I considered my options. I wasn't far from Prince George when I spotted a roadside park. Blue Cedars RV Campground fit the bill so I stopped, paid for a site, and put up my tent. I soon realized that my entire site (and, in fact, the entire campground) was covered in thousands of unwanted visitors.

Tent caterpillars were everywhere! They wriggled all over my picnic table's legs and crawled on its benches. It's saying a lot that I was actually unable to enjoy Kraft Dinner due to the overabundance of caterpillars. I was hopeful throughout my meal that every bite would not result in a mouthful of busted caterpillar guts. Thankfully, none did. It's one thing to minimize the goodness that is Kraft Dinner. It's quite another to mess with my precious sleep. But that's exactly what the caterpillars did. How dare they!

June 22, 2013 - Day 28

I normally sleep soundly but I couldn't this time. Maybe it had something to do with the caterpillar that was crawling on my face? When it woke me up, I picked it off my nose (thankfully, it was on the exterior so I didn't have to pick it out of my nose) and threw it to the far end of my sleeping bag. I then realized that caterpillars were all over my tent. They cavorted about on its poles, moonbathed on the underside of its mesh fly and generally had what appeared to be a raucous caterpillar party all over the place. I think they probably pumped some Taylor Swift from their caterpillar iPhones to their caterpillar speakers and I can't begrudge them for that. I didn't think any more were inside my tent or on my person but there was no way to confirm my suspicions. One's mind can play evil tricks and make anything feel like a writhing insect!

After my eventful night, I couldn't wait to get out of the campground. I noticed far more caterpillars in the morning - I couldn't take a step without crushing at least a few caterpillar dreams. I packed up by 7:30 AM and looked for a breakfast stop, hopefully one devoid of infestations.

My wishes were granted at Ten Mile Lake Provincial Park. I continued further south and stopped at Lac La Hache Provincial Park for lunch. I was getting closer to civilization. I stopped at a fruit stand and bought my first local fresh food in ages - BC cherries and potatoes.

One of the great things about not having reservations is that you inevitably discover lots of places that you wouldn't otherwise. Marble Canyon was such a place for me. I hardly knew anything about it but it turned out to be gorgeous. My map showed aptly named Marble Canyon Provincial Park beside the highway so I stopped in, liked what I saw, and got a campsite right on the small lake beneath a towering cliff.

Campsite at Marble Canyon Provincial Park, British Columbia, Canon 7D with Canon EF-F 10-22mm @ 10mm, 1/10s at  f/16, ISO 400

Campsite at Marble Canyon Provincial Park, British Columbia, Canon 7D with Canon EF-F 10-22mm @ 10mm, 1/10s at  f/16, ISO 400

I drove around to check out the scenery and restock some supplies (the nearest store was more than 30 km away!) and I was suitably impressed. Interesting geological formations dotted the skyline and spectacular views of canyons and valleys were visible all along the highway.

Marble Canyon, British Columbia, Canon 7D with Canon EF 28-300mm @ 130mm, 1/125s at f/16, ISO 400

Marble Canyon, British Columbia, Canon 7D with Canon EF 28-300mm @ 130mm, 1/125s at f/16, ISO 400

Marble Canyon, British Columbia, Canon 7D with Canon EF-S 10-22mm @ 10mm, 1/160s at f/8, ISO 1600

Marble Canyon, British Columbia, Canon 7D with Canon EF-S 10-22mm @ 10mm, 1/160s at f/8, ISO 1600

I fried up my potatoes for dinner, had a peaceful paddle in the extremely calm lake that I shared with a pair of loons, and retired for the evening.

Marble Canyon Provincial Park, British Columbia, Canon 7D with Canon EF 28-300mm @ 28mm, 1/100s at  f/8, ISO 1600

Marble Canyon Provincial Park, British Columbia, Canon 7D with Canon EF 28-300mm @ 28mm, 1/100s at  f/8, ISO 1600

Marble Canyon Provincial Park, British Columbia, Canon 7D with Canon EF 28-300mm @ 28mm, 1/125s at  f/8, ISO 1600

Marble Canyon Provincial Park, British Columbia, Canon 7D with Canon EF 28-300mm @ 28mm, 1/125s at  f/8, ISO 1600

June 23, 2013 - Day 29

With lots of time to spare, I opted for a full-on breakfast of pancakes and hot chocolate rather than my traditional and quick breakfast of oatmeal and hot chocolate. I don't know why hot chocolate hasn't become normal fare for mornings in civilization but it's a darn good idea when camping.

I packed away all my gear, put my kayak on my SUV, and left Marble Canyon at 9:30 AM. I stopped at Duffey Lake for some great vistas.

Duffey Lake, British Columbia, Canon 7D with Canon EF 28-300mm @ 28mm, 1/640s at  f/16, ISO 400

Duffey Lake, British Columbia, Canon 7D with Canon EF 28-300mm @ 28mm, 1/640s at  f/16, ISO 400

Duffey Lake, British Columbia, Canon 7D with Canon EF 28-300mm @ 60mm, 1/250s at  f/22, ISO 400

Duffey Lake, British Columbia, Canon 7D with Canon EF 28-300mm @ 60mm, 1/250s at  f/22, ISO 400

I got to the parking lot at Joffre Lakes Provincial Park around noon, fueled up with an orange and a couple of peanut butter and honey sandwiches and hiked in to Upper Joffre Lake. The lake was the gorgeous blue color that glacial lakes are. It was an 11.1 km return hike with a decent uphill section and my legs felt it when I got back to my car.

Upper Joffre Lake, Joffre Lakes Provincial Park, British Columbia, Canon 7D with Canon EF-S 10-22mm @ 10mm, 1/100s at f/16, ISO 400

Upper Joffre Lake, Joffre Lakes Provincial Park, British Columbia, Canon 7D with Canon EF-S 10-22mm @ 10mm, 1/100s at f/16, ISO 400

After the hike, I drove further south and encountered an aspect of civilization that had thankfully eluded me almost my entire trip - traffic. Ugh. I started to look for a place to camp around 6:00 PM near Squamish and eventually followed signs for Paradise Valley Campground.

I fried up the remaining potatoes and ate them with salmon salad sandwiches for dinner and did the dishes just before it started raining. Remarkably, precipitation had been another foreign concept on my trip. I had encountered almost no rain for four weeks so I figured I could endure an overnight shower.

June 24, 2013 - Day 30

Alas, this was no overnight shower. Leaving a campsite in the rain is no fun so I valiantly tried to wait it out. I gave up around 9:40 AM, got out of my tent, packed it up into a soaking mass, threw it in my car, and got out of dodge. I needed a place to eat breakfast and I couldn't resist the overly-Canadian option of Tim Horton's in Squamish.

Soon I was in Vancouver, anxious to replace my smashed iPhone screen. Google Maps took me to Pineapple Repairs and I started to search for a parking spot. There were none. I'm notorious for not parallel parking but even that option wasn't available. They were simply no open spaces. I drove around the block a few times and eventually found a spot about 25 blocks from the store. I put coins in the meter but nothing happened. I put more coins in the meter and more nothing happened. Then I saw the "Cards Only" sign on the meter. If it's a cards-only meter, then why have coin slots? I guess that's one of life's great and frustrating mysteries.

Not wanting to get a parking ticket, I abandoned roadside parking and found a downtown garage. Perhaps my frustration impacted my memory because I apparently forgot that I had a kayak on my roof. I pulled into a place with very low clearance and my kayak hit the clearance bar, thankfully at very slow speed. I was stuck and felt unbelievably stupid. My kayak wasn't damaged but I needed help from the attendant. He stopped traffic so the dumb guy from Ontario could back up and find a garage with higher clearance.

I eventually found one with slightly higher clearance, chanced it, and barely fit under the bar. I parked and walked to the supposed location of Pineapple Repairs. More frustration. They had moved and their new location was not on the door or their website. I was within walking distance of iRepair so off I went, guided by Google Maps on the very phone that was to be repaired.

iRepair had the screens for my phone but I was told that many in the batch had been defective. The only way to know for sure was to replace my screen and see if the new one worked. I had to come back hourly for three hours to check on the progress. The first two times all screens had been defective. The third time, the guy had finally found one that worked but it was the wrong color. Whatever. I took my working and unmatched phone, ready to return to my car.

That's when it hit me - I had no idea where I parked. I wandered around Vancouver for a couple of hours, hoping to see something familiar and failing miserably. I walked inside about ten parking garages but not once did I see the familiar orange and red of my kayak. Eventually I got help from a very nice parking garage attendant and we found my vehicle. Was it the same guy who stopped traffic for me earlier? I was too dazed and confused to tell. I was simply elated for the afternoon to be over.

That night, I uneventfully stayed in a Vancouver hotel and the following day was the start of my staff training for the Shad Valley enrichment program at UBC. It was incredible! I got to meet and work with ten exceptional staff members that became my friends. I met 54 amazing students from across Canada and around the world and helped teach them important life lessons - reach for the stars, befriend everyone (especially parking garage attendants), remember where you park, and use a slow speed if you're going to get stuck under a clearance bar with a kayak on your roof. My month with Shad Valley was the most fulfilling job I've ever had and my journey with Shad Valley continues to this day.

Thanks to a chance encounter during the program, I landed a job doing outreach. Now I get to travel around the country to promote the program to students, parents, educators, and business leaders. My drive to Yukon and the work I did in BC on my way home changed my life for the better so let that be a lesson. Get out there. Explore this fantastic world. Who knows what you'll find?

Yukon Trip - Days 22-26: Gorgeous Alaska

June 16, 2013 - Day 22

I love to travel. Being in the wilderness and seeing the exceptional beauty that exists in nature brings me great joy. However, it can be a challenge to be away from family and friends for long periods of time. I was particularly aware of this fact when I awoke in Haines, Alaska on the shores of the Chilkoot Inlet of the Pacific Ocean. It was almost Father's Day and my mother was nearing her 70th birthday but that was in Belleville, Ontario and I was over 5700 kilometres and a 61-hour drive away. I wasn't going to make it.

Technology can be such a double-edged sword but this time I used it to my full advantage. I eased my slight homesickness by skyping with my parents. We talked a bit about my latest escapades (I saw grizzly bears!) and I wished them both well. Now what?

I decided that the weather was just too good not to go kayaking. I opted to put in at nearby Chilkoot Lake State Park (they call it a state recreation area but what's the difference?). What an amazing place to kayak! The snow-capped mountains rose directly from the lake. The complete absence of wind led to stunning reflections on the water. And to top it all off, a family of common mergansers was very accommodating and posed for some nice portraits. It was a challenge to get all of the little ones facing the same direction!

Common Mergansers, Chilkoot Lake, Alaska, Canon 7D with Canon EF 28-300mm @ 300mm, 1/2000s at f/8, ISO 1600

Common Mergansers, Chilkoot Lake, Alaska, Canon 7D with Canon EF 28-300mm @ 300mm, 1/2000s at f/8, ISO 1600

Chilkoot Lake, Alaska, Canon 7D with Canon EF 28-300mm @ 28mm, 1/640s at f/16, ISO 400

Chilkoot Lake, Alaska, Canon 7D with Canon EF 28-300mm @ 28mm, 1/640s at f/16, ISO 400

After my brief tour around the perimiter of Lake Chilkoot, I returned to Haines, thankful for some pretty birds along the way. Harlequin ducks are uniquely adorned with white spots and cinnamon patches. They're unmistakable. I had seen singles in Ontario before but never a group. Sweet!

Harlequin Ducks, Lutak Road, Haines, Alaska, Canon 7D with Canon EF 500mm, 1/3200s at f/8, ISO 1600

Harlequin Ducks, Lutak Road, Haines, Alaska, Canon 7D with Canon EF 500mm, 1/3200s at f/8, ISO 1600

Also in the water were huge groups of white-winged and surf scoters. They looked like synchronized swimmers as they dove in sequence. I couldn't tell which one was the choreographer.

I also lucked into a species I had never seen before - a pigeon guillemot. It was way out there and I had to zoom in on the photo to identify it but it was also unmistakable - the black triangular patch jutting into the white leaves no doubt.

Pigeon Guillemot, Lutak Road, Haines, Alaska, Canon 7D with Canon EF 500mm, 1/500s at f/8, ISO 1600

Pigeon Guillemot, Lutak Road, Haines, Alaska, Canon 7D with Canon EF 500mm, 1/500s at f/8, ISO 1600

Long road trips are extraordinarily fun put there are times when some less-than-fun events just have to happen. Take the front seat of my car. Without a passenger to keep it occupied, it becomes a bewildering mess of maps, food (both ready to eat and already eaten), cutlery, cameras, backpacks, clothes, and whatever else one accumulates while crossing international and provincial borders. June 16 was the day - it had to be cleaned. Ah, there's where that orange peel went! What a glamorous life I lead.

Another spectacular actually-includes-food-that-needs-refrigeration meal awaited me. The nice lady at the RV park informed me of a potluck crab dinner that she organizes every year for occupants of her establishment. She arranges with local fishermen to get local crab the day we're going to eat them. I was more than happy to provide couscous cooked on my campstove to a fantastic assortment of king crab legs, salads, and other meals cooked by the other campers. I love crab but I was once again reminded how frustrating it can be to eat it!

Haines, Alaska, Canon 7D with Canon EF 28-300mm @ 28mm, 1/640s at f/16, ISO 400

Haines, Alaska, Canon 7D with Canon EF 28-300mm @ 28mm, 1/640s at f/16, ISO 400

June 17, 2013 - Day 23

I was forced awake before 6:00 AM by a problem I did not expect in Alaska - the blazing sun. I tried to overcome its intensity but it was a losing battle. I eventually gave up and decided to go for a drive at 6:30 AM.

Shortly after leaving Haines, I had a close encounter with a grizzly bear, likely the same individual I saw wandering around the day before within 30 feet of unsuspecting locals. This time, it occupied the oncoming lane of the road and it walked right past my car, close enough that I could have touched it. I think it wanted me to roll down my window and give it a high five but my boney hands would have been no match for its massive claws.

After breakfast, I packed up my tent and got ready for the ferry ride to Skagway, Alaska. It was lightly raining when I got to Skagway after lunch so I didn't stick around. Instead, I continued north towards Yukon. I got to the now-familiar Robert Service Campground on the edge of Whitehorse, selected site #68, ate dinner, and headed into town to peruse wilderness of a different sort - Walmart. It was raining more heavily as I exited the store and that's when disaster struck, in a first world lucky guy kind of way.

My iPhone was not secured in my shorts pocket and as I ran to avoid the rain, it popped out and crashed into the parking lot pavement below. Was it damaged? You betcha. The front screen was shattered but it still worked. I would have to get it fixed but that wouldn't happen until I got to Vancouver.

June 18, 2013 - Day 24

My extraordinary luck with precipitation continued as there was no rain overnight. Despite the ominous signs above, it remained clear in the morning as I packed up my tent. I stopped for an oil change in Whitehorse before heading back into British Columbia. Have I mentioned that I love road trips that are so long that you need to get an oil change? I was particularly happy on this trip as I was beyond 10000 kilometres and had already endured my second.

I drove almost all day and arrived at the junction of the Alaska Highway and BC's Highway 37 (the Stewart-Cassiar Highway) at 4:10 PM. Soon after turning south onto Highway 37, I encountered a mother black bear with a cub. That's always a fun sight but this little one, though still cute, looked a little ragged.

American Black Bear, Highway 37 just south of Alaska Highway, Yukon, Canon 7D with Canon EF 28-300mm @ 180mm, 1/250s at f/8, ISO 1600

American Black Bear, Highway 37 just south of Alaska Highway, Yukon, Canon 7D with Canon EF 28-300mm @ 180mm, 1/250s at f/8, ISO 1600

There aren't many provincial campgrounds in the extreme northern reaches of BC so I opted to stay at Boya Lake Provincial Park. There was another black bear beside the park's entrance road to remind me to be extra careful with food in my campsite. Boya Lake is a gorgeous lake. It is an amazing aquamarine colour and when I was there it was extremely calm. I went for two short paddles - one in the evening and again the next morning before I left. I was hoping for lots of wildlife but I only saw spotted sandpipers and red-breasted mergansers.

June 19, 2013 - Day 25

After my early-morning paddle I packed up and headed further south along Highway 37. Having read a report that one guy had seen 37 bears along this stretch of road on a single trip, I kept my eyes peeled. However, there was a light rain the whole time and I had to wait at least two hours before I saw my first bear. Pity me. There was a grizzly about ten kilometres north of Meziadin Junction and a black bear about nine kilometres past that.

At Meziadin Junction, I decided to head west on Highway 37A towards the twin towns of Stewart, British Columbia and Hyder, Alaska. Highway 37A is also known as the Glacier High and I would soon find out why. The views along the highway are incredible! You drive right beside massive sheets of ice and snow, majestic mountains, and lush green forest. If you are ever in this area, the side-trip along Highway 37A is a must!

Highway 37A to Stewart, British Columbia, Canon 7D with Canon EF 28-300mm @ 28mm, 1/2500s at f/8, ISO 1600

Highway 37A to Stewart, British Columbia, Canon 7D with Canon EF 28-300mm @ 28mm, 1/2500s at f/8, ISO 1600

After stopping to revel in the glory of a few mountains, I arrived in Stewart, BC and opted to camp in the Bear River RV Park. It had free WiFi, pay showers, and a nice location slightly away from the main part of town. It doesn't usually host tents but they let me put mine up on the quiet lawn beside their infrequently used laundry room. Everything about the location was terrific except for the bugs. They tormented me while I put up my tent and I had had enough before dinner. I locked myself in my car to separate myself from my biting neighbours and enjoyed salmon salad sandwiches and canned peaches.

After dinner, I drove to Hyder, Alaska. Even though they share an international border, Stewart and Hyder have different approaches. There is no US Customs office in Hyder so you are free to go to that part of the United States without stopping. However, there is a Canada Customs office in Stewart so when you return from Hyder you have to go through customs. Over the next few days, the friendly people at that border crossing really got to know me well!

Hyder is another beautiful location. Everything was so green!

Moose Pond, Hyder, Alaska, Canon 7D with Canon EF 28-300mm @ 28mm, 1/2000s at f/8, ISO 1600

Moose Pond, Hyder, Alaska, Canon 7D with Canon EF 28-300mm @ 28mm, 1/2000s at f/8, ISO 1600

Hyder is famous for its Fish Creek Wildlife Observation Site, where you can walk on a boardwalk directly above bears hunting in the stream below. Alas, I wasn't there at the right time of year for that experience.

However, I did see a grizzly right beside the road nearby. It allowed me to get full-frame shots with a 300mm lens, something that would not be recommended unless you were protected in some way. I fear for this bear. It's yellow ear tag likely indicates that it has had previous human encounters.

On the short drive back to Stewart I saw two more black bears, one of which climbed a telephone pole to escape!

Grizzly Bear, Hyder, Alaska, Canon 7D with Canon EF 28-300mm @ 300mm, 1/320s at f/8, ISO 1600

Grizzly Bear, Hyder, Alaska, Canon 7D with Canon EF 28-300mm @ 300mm, 1/320s at f/8, ISO 1600

June 20, 2013 - Day 26

I could get used to waking up in Stewart, British Columbia, especially at this time of year. I can't get over how alive everything seems. The rivers are flowing, vegetation is growing, and the birds are singing.

Estuary in Stewart, British Columbia, Canon 7D with Canon EF-S 10-22mm @ 10mm, 1/25s at f/22, ISO 400

Estuary in Stewart, British Columbia, Canon 7D with Canon EF-S 10-22mm @ 10mm, 1/25s at f/22, ISO 400

I headed into Hyder and walked along its main drag. Walking back to my car, I saw a black bear with two cubs race across the road right behind my car. I was struck by the nonchalance of the locals. I have great respect for bears and the damage they could do but the locals seemed completely indifferent. I guess if you see bear cubs almost every day it just becomes part of the routine. I hope I never become that jaded to the beautiful sight of bears!

After lunch, I drove to a glacier. What a fantastic concept! Let me say it again. I drove to a glacier! The Salmon Glacier is supposedly the largest glacier in the world where you can drive to its end. To put it mildly, I am a fan.

Salmon Glacier, British Columbia, Canon 7D with Canon EF 28-300mm @ 35mm, 1/1000s at f/16, ISO 400

Salmon Glacier, British Columbia, Canon 7D with Canon EF 28-300mm @ 35mm, 1/1000s at f/16, ISO 400

Getting to the glacier was definitely part of the fun. The gravel road twists and turns its way up a mountain and there aren't any guard rails. In many places, water flowed directly across the road and I could see significant washout potential.

Salmon Glacier Road, British Columbia, Canon 7D with Canon EF 28-300mm @ 35mm, 1/200s at f/20, ISO 400

Salmon Glacier Road, British Columbia, Canon 7D with Canon EF 28-300mm @ 35mm, 1/200s at f/20, ISO 400

The panorama view at the end of Salmon Glacier Road definitely made the drive worthwhile!

On the drive back to Stewart, there were seals in the harbour and terns, cedar waxwings, bald eagles, and kingfishers along the estuary trail. Bears, glaciers, and seals, all on the same day. What a magical place!

Harbour Seal, Stewart, British Columbia, Canon 7D with Canon EF 500mm, 1/125s at f/8, ISO 1600

Harbour Seal, Stewart, British Columbia, Canon 7D with Canon EF 500mm, 1/125s at f/8, ISO 1600