Importing Images to Lightroom
/This post describes how I import images to Adobe Lightroom. It's a vital part of my photography workflow.
Lightroom's Import button is only available in the Library module, so I go there and click it to open the Import Dialog:
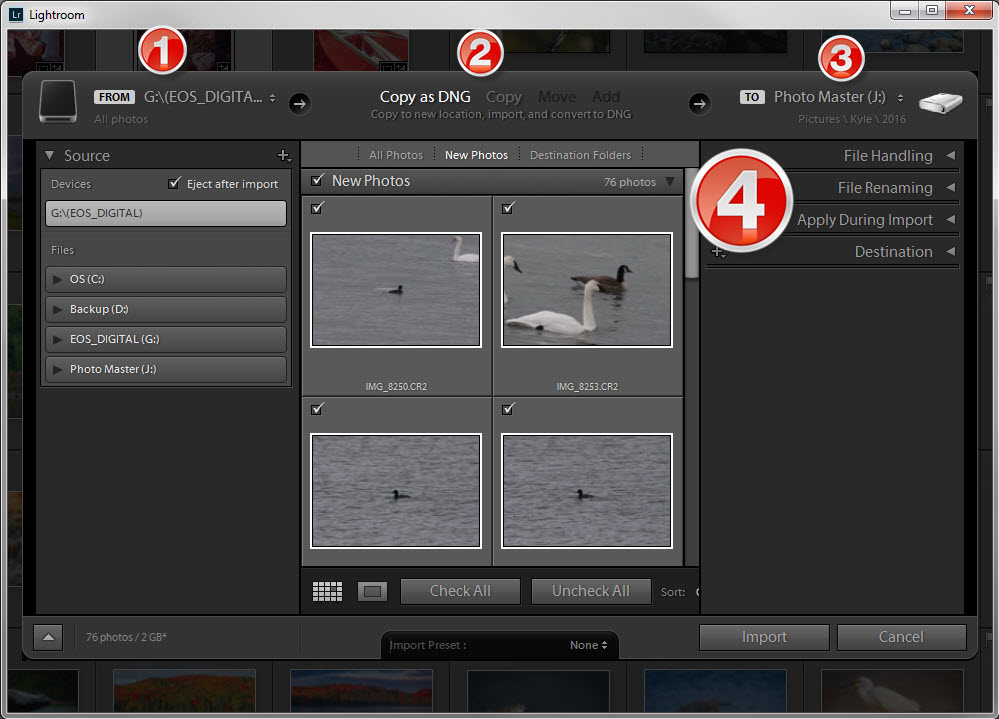
Adobe Lightroom's IMPORT DIALOG
The Import Dialog has four main sections:
- Source
- File Manipulation
- Destination
- Option Panels
Each section is explained below.
Source
I select the drive of my camera's memory card and check the box that ejects the drive after the import is complete. As soon as the import is complete, I put the card back in my camera to minimize the chance of in-the-field-with-no-memory-card-in-my-camera syndrome.
File Manipulation
I select to copy as DNG unless I expect to delete many photos. In that case, it's more efficient to copy the files as is first, delete the ones I don't need and then convert the remaining files to DNG.
Destination
I select the folder for the correct year on the Photo Master external hard drive. Click here for details on the folders and files I use to keep my images organized.
Option Panels
File Handling

Adobe Lightroom's Import Dialog: FILE HANDLING PANEL
I select the following in the File Handling panel:
- Build 1:1 Previews - I prefer to build 1:1 previews during the import process to minimize delays during development.
- Don't Import Suspected Duplicates - I don't want a second copy if an image is already in the Lightroom catalog.
- Make a second copy - I make a backup copy during the import process in case I mistakenly delete a file. Click here for more details on my backup workflow.
File Renaming

ADOBE LIGHTROOM'S IMPORT DIALOG: FILE RenamING PANEL
In the File Renaming panel, I select the following:
- Template - I rename files using a template that includes the date each image was taken, the camera body used to take it, and the filename as recorded by the camera. Click here for details on the folders and files I use to keep my images organized.
- Make extensions lowercase - This is a personal preference - I don't want my file extensions yelling at me.
Apply During Import

ADOBE LIGHTROOM'S Apply During Import PANEL
In the Apply During Import panel, I select the following:
- Develop Settings - I use a develop preset to automatically apply my most frequently-used edits to every image - adding clarity, vibrance, saturation, and sharpening; reducing noise; enabling profile corrections, and removing chromatic aberration.
- Metadata - I use a metadata preset that adds my name, city, website, email address, and copyright details into every image. Doing so makes it slightly easier to catch someone who uses one of my images without my permission.
Destination

ADOBE LIGHTROOM'S IMPORT DIALOG: Destination PANEL
In the Destination panel, I select that images get put into a subfolder and are organized into one folder. Click here for details on the folders and files I use to keep my images organized.