Geotagging Images in Lightroom
/This post explains geotagging in Lightroom, the process of adding location metadata to images. Geotagging is a significant part of my photography workflow. Lightroom's full integration with Google Maps is one of my favourite features. Maps inspire me. There's always another remote road to drive, spectacular vista to encounter, and enticing trail to hike.
Aside from its "cool" factor, geotagging is useful because it's one of the main ways I search for images. I also search based on the date an image was taken (thanks to my folder and file structure) or based on an image's subject (after I've added keywords, which I'll write about in a separate post).
Geotagging is done in Ligthroom's Map module. After you've geotagged your images, that module displays a map with pins showing where your images were taken:
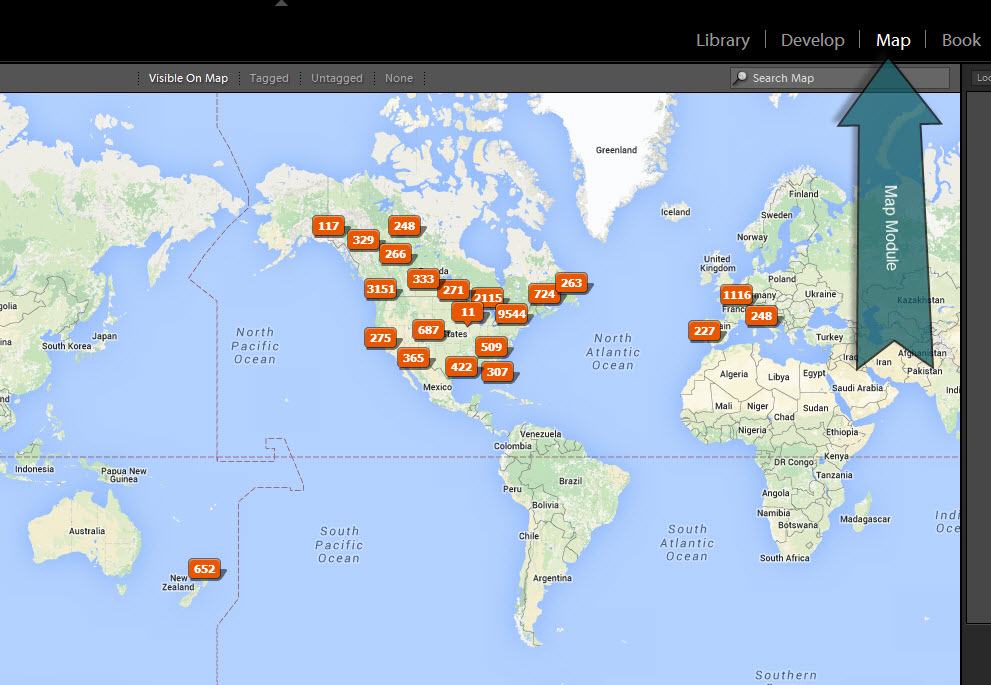
Lightroom's Map module, showing where my images were taken
Given my residence, it's not surprising that most of my images were taken in North America. You can zoom in on the map to see more detail:
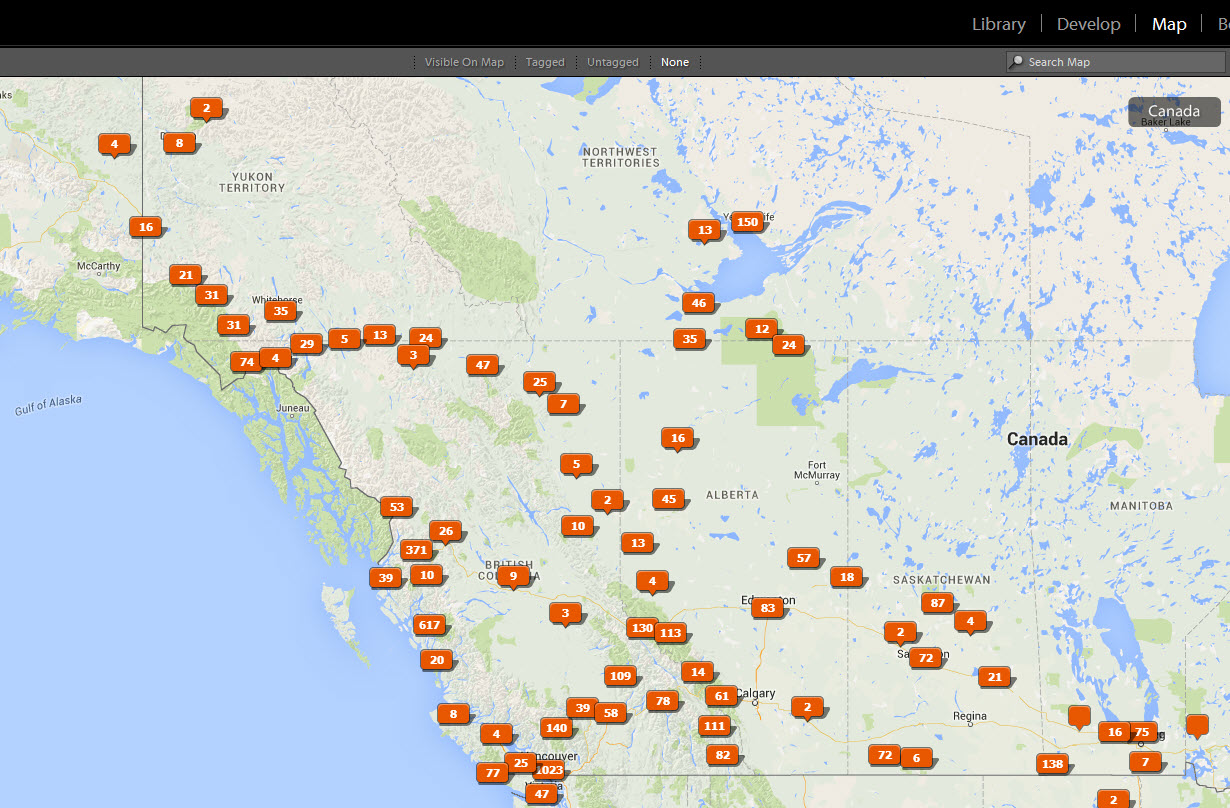
LIGHTROOM'S MAP MODULE, SHOWING WHERE MY IMAGES WERE TAKEN in western Canada and the Territories
You can click on the markers to highlight the images taken at that location but the coolest feature is Lightroom's ability to show you only those images that were taken on the visible area of the map. For example, suppose I want to find the images I took near Stewart, British Columbia. If I remembered when I was there, I could browse my folders by year and date. If I don't remember when I was there, I can type "Stewart, BC" into the location search box, zoom as appropriate, and then click on Visible on Map to enable that filter:

Lightroom's "Visible on Map" FEature
Amazing! Only the 26 images visible on the map are selected. I can then navigate to the folder by right-clicking on any image and selecting Go to Folder in Library.
Instructions
Some cameras (such as the Canon 6D) can automatically add location metadata to every image. However, I turn that feature off because it uses a lot of battery power (even when the camera is turned off). It's so easy to geotag in Lightroom that I don't feel that I'm missing anything. If I'm at a location that I think might be hard to remember, I can always take a photo with my iPhone and have it record the location without wasting my camera's battery.
The following screenshot shows Lightoom's Map module and identifies the features that let you geotag images:

Geotagging in Lightroom: Suggested Location Metadata
To geotag images in Lightroom:
- Switch to the Map module (A).
- Select all images taken at a location (B). My
folder structure
makes this easy. In the screenshot, I'm in a folder where all images were taken at the same location (Wellington Harbour) so I can
Edit→Select All. - Use the search box (C) and/or change the map style (D) to zoom to the exact location.
- Right-click on the map where the images were taken and select
Add GPS Coordinates to Selected Photos. This should provide suggestions forISO Country Code,Country,State/Province,City, andSublocation. Suggestions appear in light grey (E). If suggestions don't appear, you need to enable the feature: InEdit→Catalog Settings→Metadata, make sure thatLookup city, state, and country of GPS coordinates to provide address suggestionsis checked. - Confirm the suggestions by clicking on the field name (such as
ISO Country Code) and selecting the correct value. - Manually enter a sublocation. For example, I want the sublocation for these images to be
Wellington Harbourrather than the suggestedBloomfield.
After values are entered into a location field (either by confirming a suggestion or manually entering a value), the light grey text turns white (F):
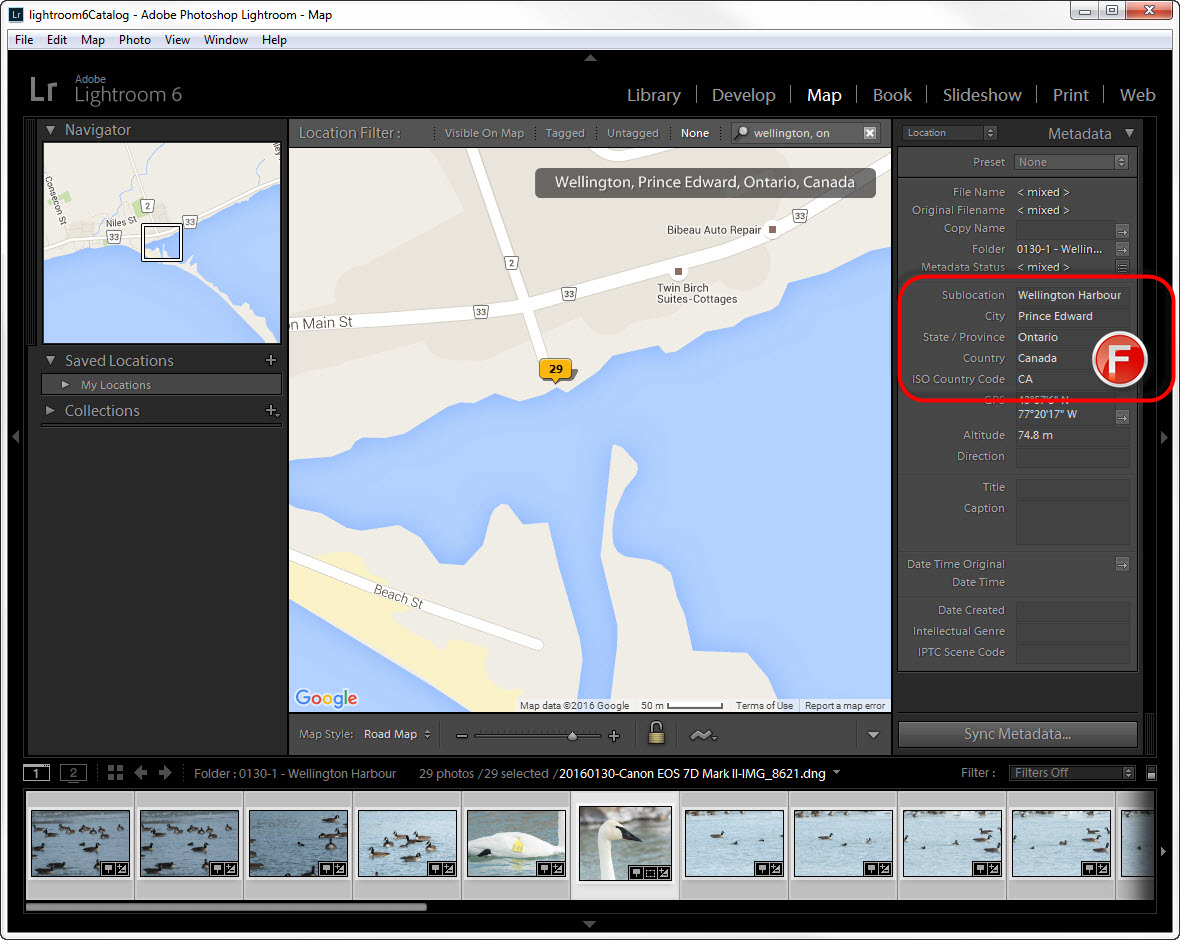
GEOTAGGING IN LIGHTROOM: ConfirmED LOCATION METADATA
Voila! You're done! Wasn't that easy? Now you can browse Lightroom's map, marvel at the places you've been, and dream of where to go next!
